App per l’erogazione automatizzata di insulina

DBLG2 System™

Il suo sensore e la sua pompa per insulina, collegati tramite l’app DBLG2.

DBLG2 porta l’erogazione automatizzata di insulina su uno smartphone compatibile*. Il suo algoritmo utilizza le letture del glucosio e le impostazioni personali per regolare l’erogazione di insulina di una pompa compatibile ogni cinque minuti. Per adulti con diabete di tipo 1.

*L’uso richiede uno smartphone, un sensore di glucosio e una pompa per insulina compatibili. La compatibilità degli smartphone può variare a seconda del paese.
Attualmente, il DBLG2 System™ è disponibile solo in Germania e nei Paesi Bassi.

Prenda confidenza con l’app DBLG2

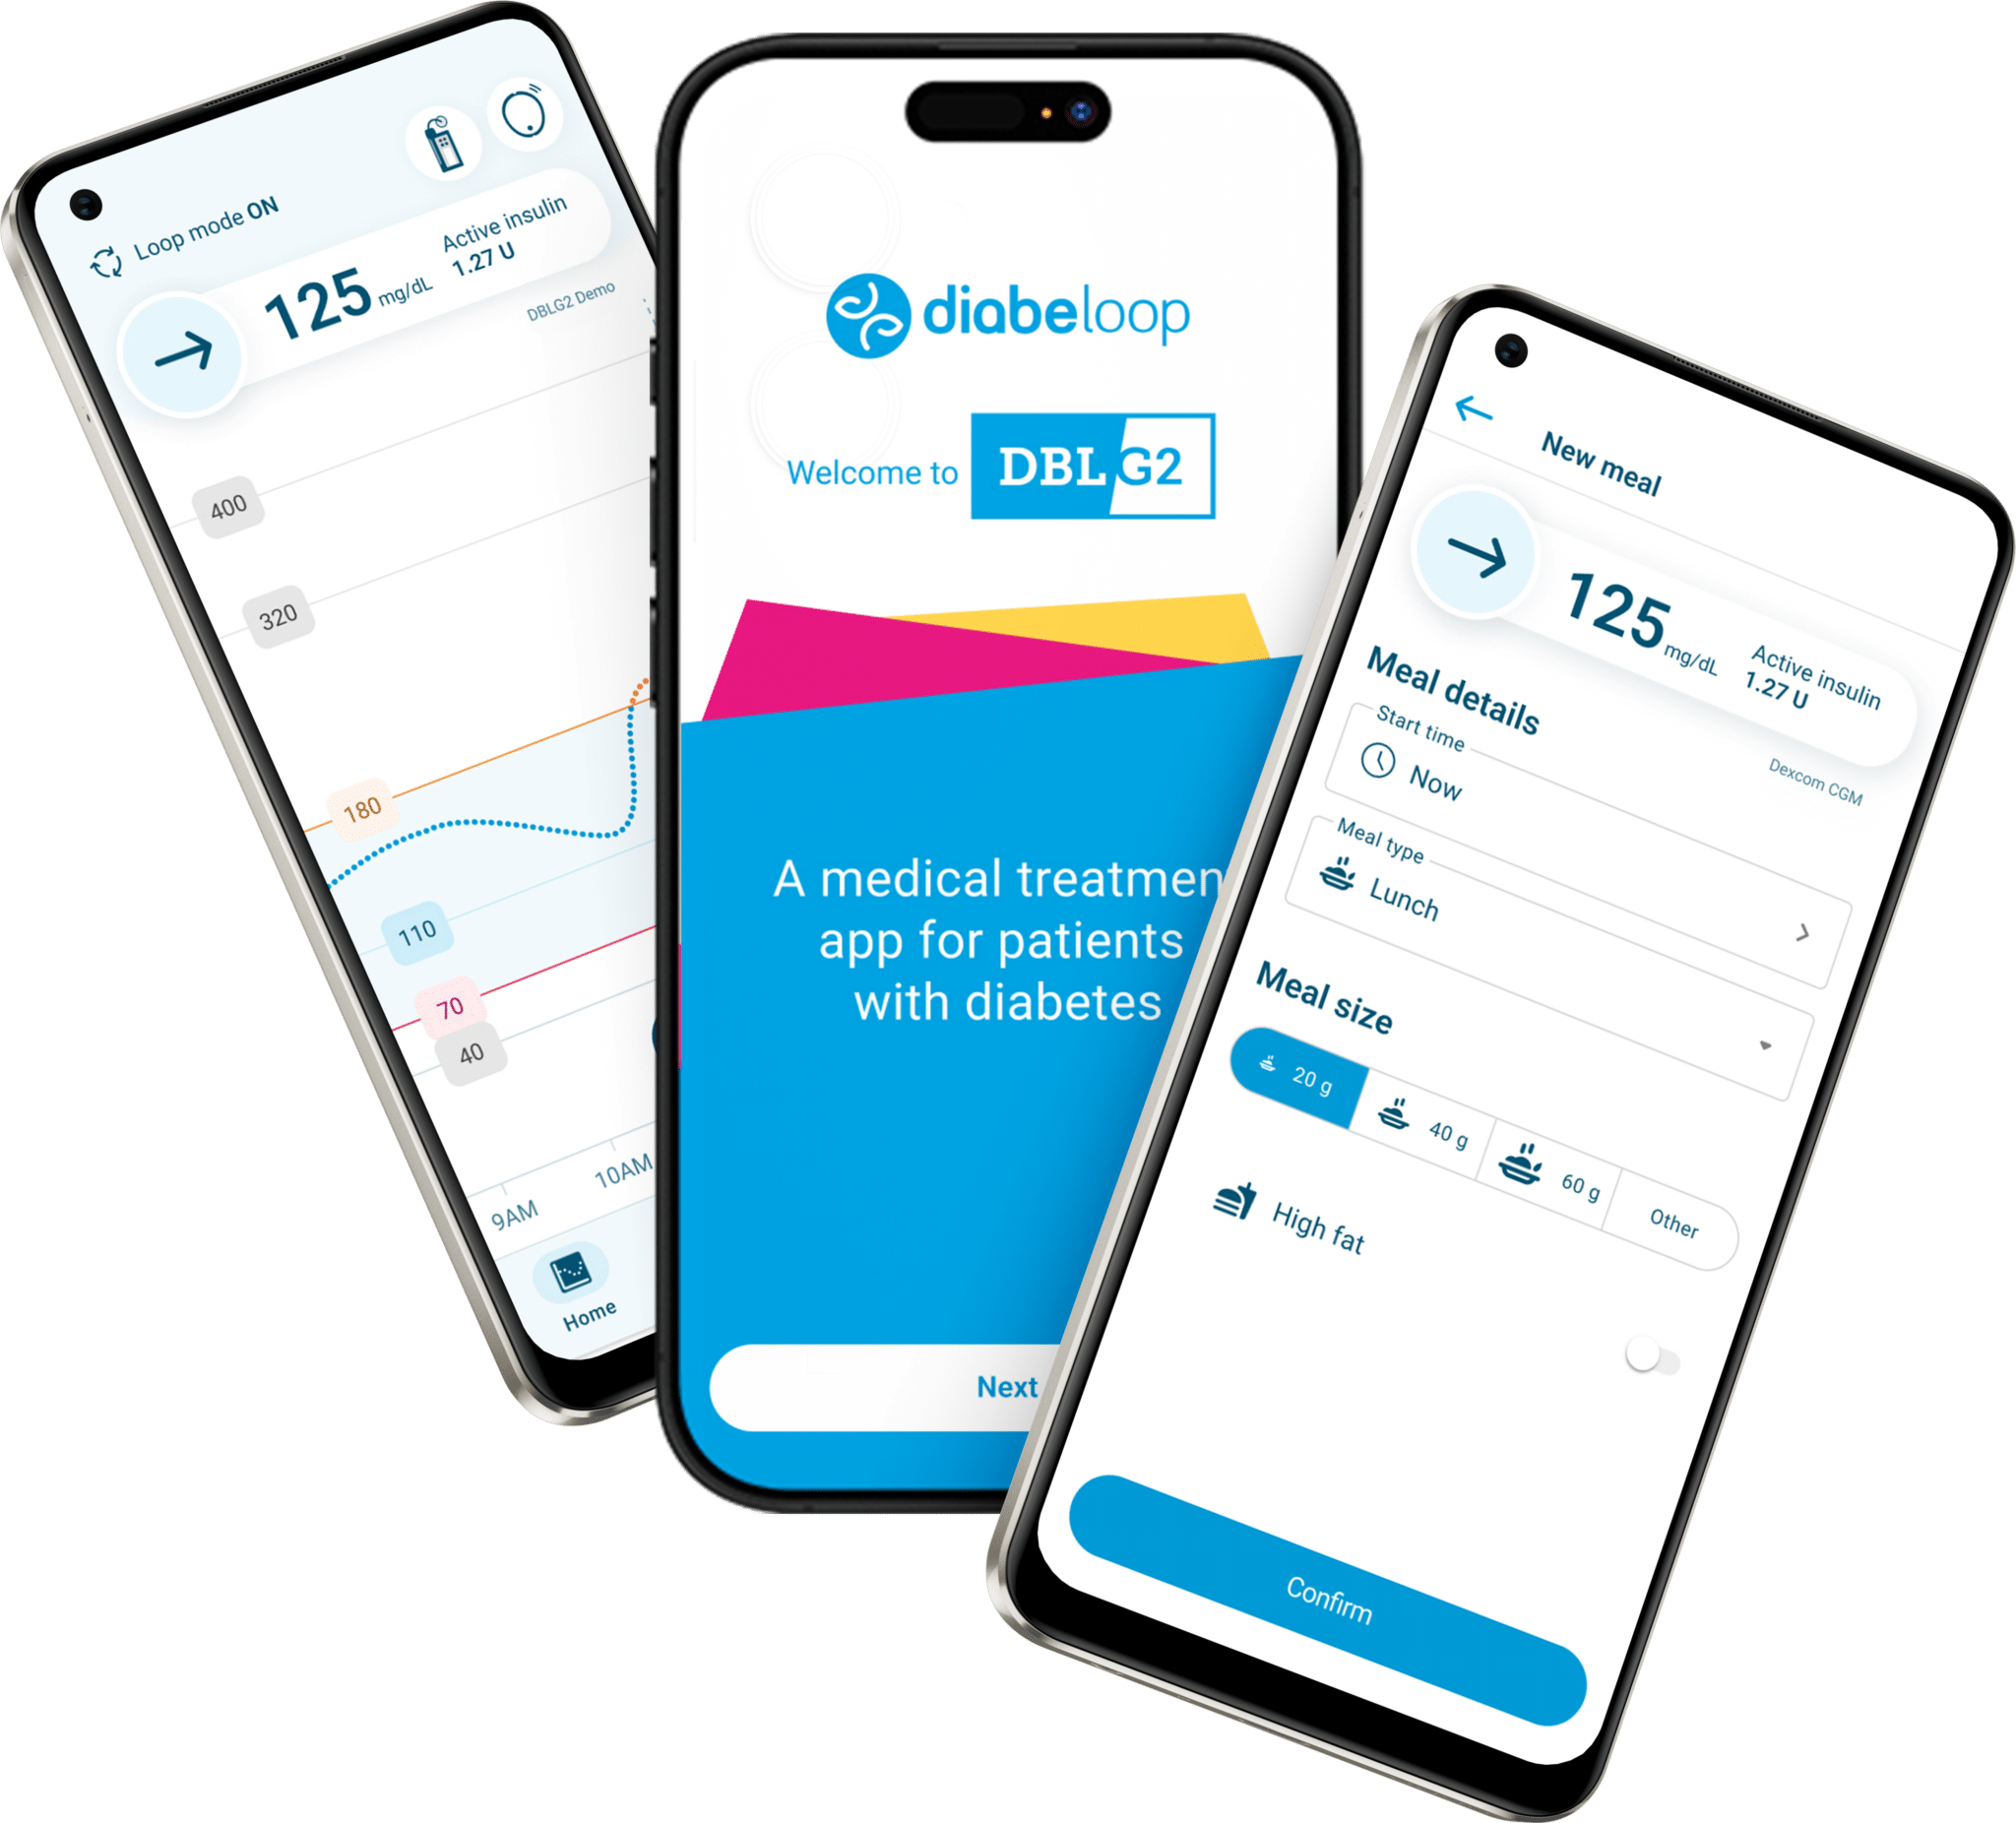
Esplori le schermate con dati simulati. Senza sensore né pompa.

Scarichi su Google Play Solo dimostrazione · Non è un dispositivo medico · Android · Solo in Germania e nei Paesi Bassi
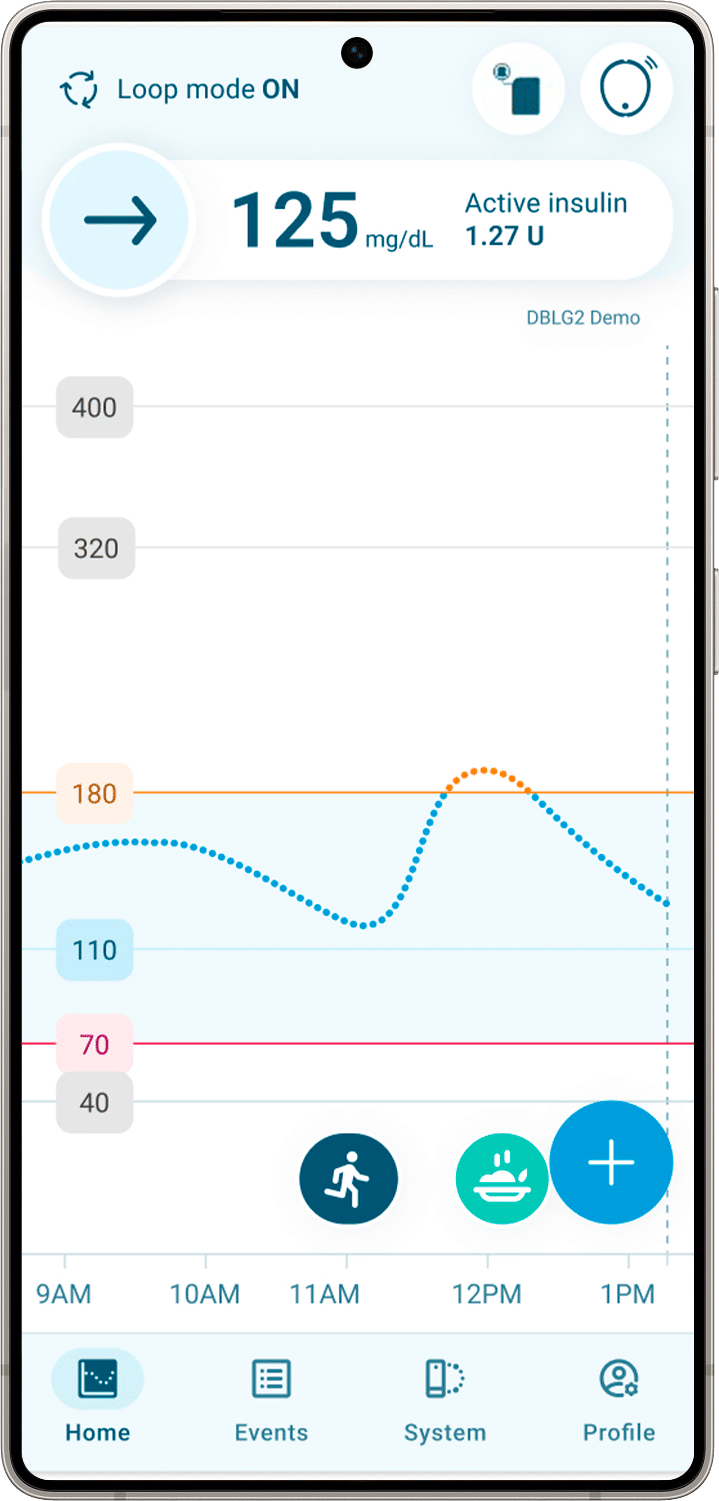
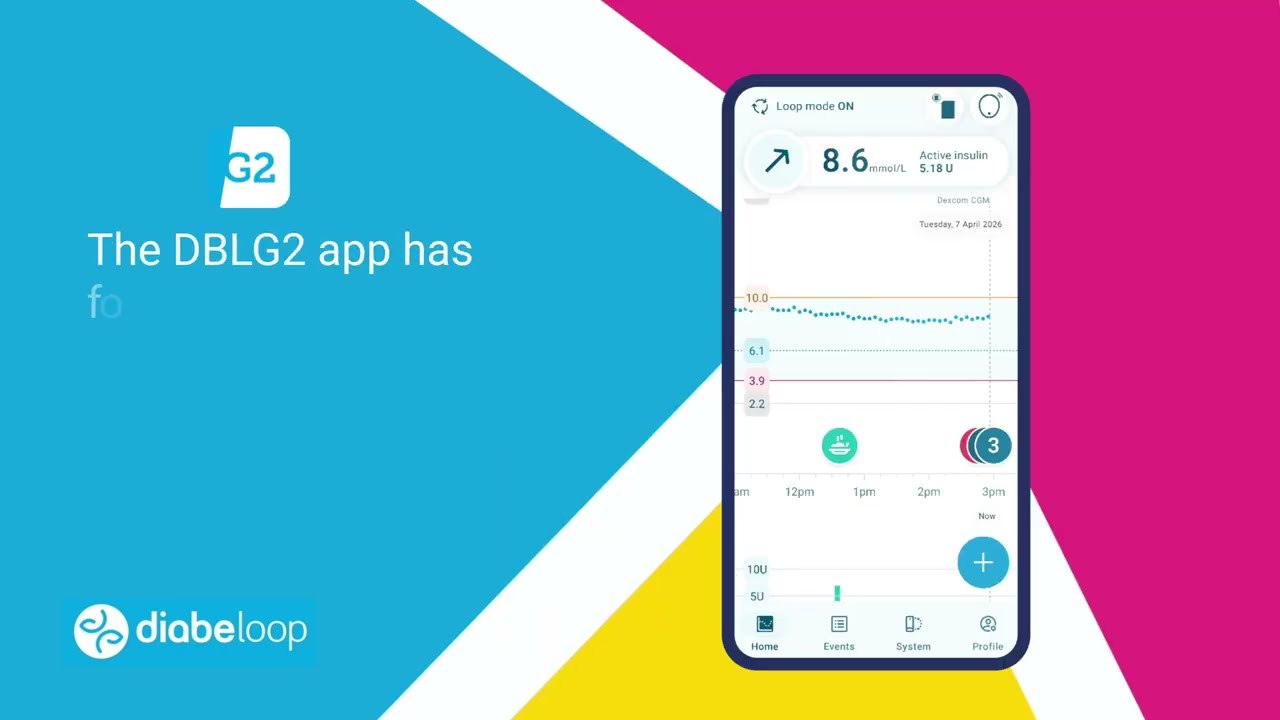
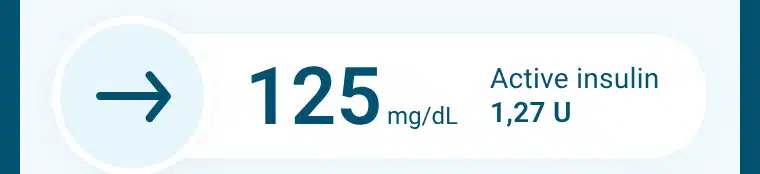
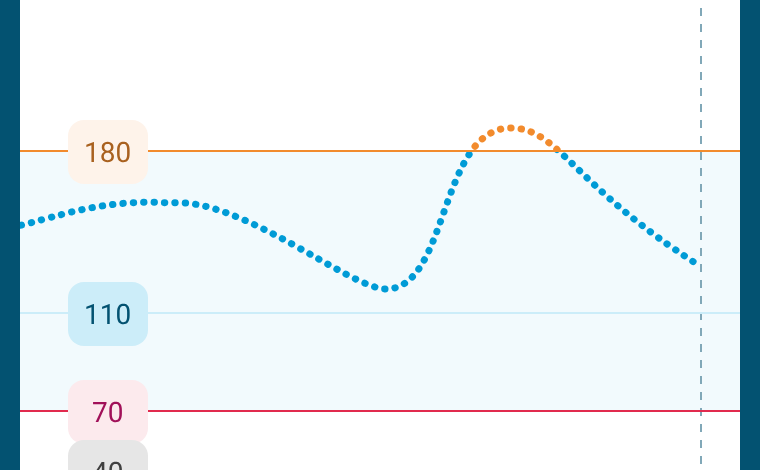
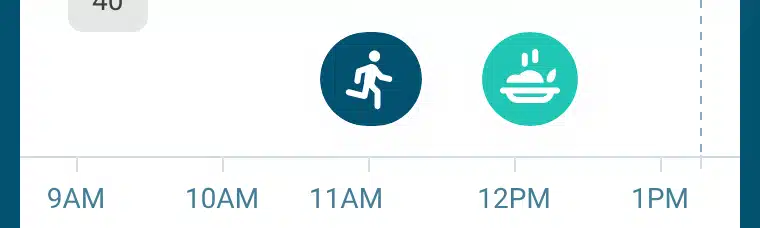
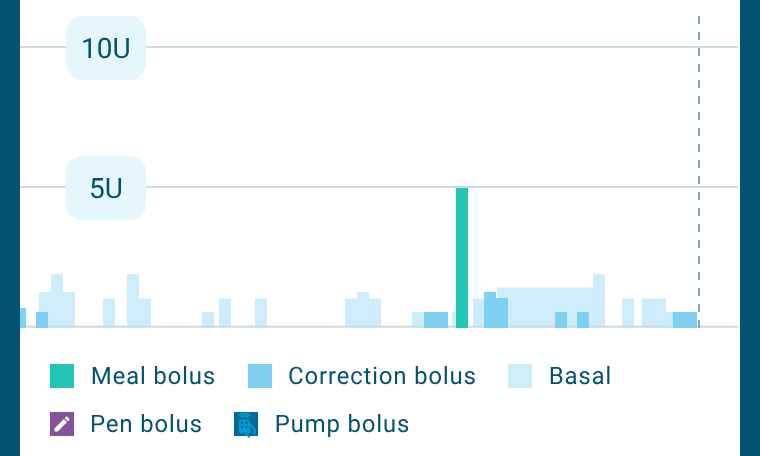
Schermata Home dell’app DBLG2 su uno smartphone Android, con le letture del glucosio e l’insulina attiva.
  1. Sensore di glucosioMisura il glucosio
  2. App DBLG2Calcola le regolazioni di insulina ogni 5 minuti
  3. Pompa per insulinaEroga l’insulina
Schermata illustrativa e icone generiche dei dispositivi. Consulti l’elenco di compatibilità per i dispositivi supportati.
  • Impostazioni personalizzate
  • Boli di correzione automatici
  • Gestione dei pasti e dell’attività fisica

DBLG2 · Vantaggi quotidiani

Pensato intorno alla sua giornata.

Controllo dallo smartphone. Evidenze cliniche.
Segnalazione dei pasti flessibile.

Controllo completo
dallo smartphone.

Gestisca il suo DBLG2 System da uno smartphone personale compatibile. Consulti nell’app le letture del glucosio e le informazioni sull’insulina, dopo aver ricevuto la formazione necessaria.3

Il suo sistema, a portata di mano.

Evidenze nella pratica reale
con DBLG2.

Obs34 · DBLG2

74,1%1

Tempo medio nel range (70–180 mg/dL).
Ultime 6 settimane · Pompa per insulina Kaleido + CGM Dexcom G6.

DBLG171,6%
DBLG274,1%
1,75%1

Tempo medio al di sotto di 70 mg/dL · Ultime 6 settimane con DBLG2.

Segnalare i pasti
è facoltativo.

Segnalare i pasti non è più obbligatorio, anche se farlo può favorire migliori risultati glicemici.2

Può anche segnalare un’attività fisica per aiutare DBLG2 ad adattare l’erogazione di insulina prima, durante e dopo l’esercizio.3

Pasti, movimento, momenti quotidiani.

Informazioni su questi risultati. Obs34 è stato un piccolo studio osservazionale non randomizzato su 20 adulti con diabete di tipo 1 passati da DBLG1 a DBLG2, con Kaleido e Dexcom G6. Le cifre sono medie dell’insieme di analisi completo nelle ultime 6 settimane di ciascun periodo di trattamento. DBLG2 ha soddisfatto il criterio di non inferiorità prespecificato per il tempo nel range; la superiorità rispetto a DBLG1 non è stata dimostrata. Queste cifre non consentono di stabilire i risultati specificamente in assenza di segnalazione dei pasti. I risultati individuali possono variare.

Dettagli dello studio e riferimenti
  1. Evidenze cliniche — DBLG2. Diabeloop SA. Safety and efficacy of DBLG2 in patients switching from DBLG1: confirmation of equivalence in real-world settings. Rapporto di indagine clinica Obs34, revisione 1 (Obs34-DBLG2-CA-CIR-001), sezioni 8.3.1 e 8.4.3, tabelle 5 e 9, pagine stampate 25 e 28. Rapporto interno di indagine clinica; dati in archivio. Lo studio ha confrontato un periodo di 90 giorni con DBLG1 con un follow-up fino a 180 giorni con DBLG2. Le cifre riportate si riferiscono agli ultimi 42 giorni di ciascun periodo nell’insieme di analisi completo (n = 20). TIR medio (DS): 71,6% (12,1) con DBLG1 e 74,1% (10,8) con DBLG2. Margine di non inferiorità prespecificato: −5 punti percentuali; non inferiorità p ≤ 0,0001. Il test bilaterale di superiorità non è risultato statisticamente significativo (p = 0,1067). TBR medio al di sotto di 70 mg/dL (DS): 1,55% (1,59) con DBLG1 e 1,75% (2,10) con DBLG2; p = 0,4441. Le dimensioni ridotte del campione e il disegno non randomizzato limitano la generalizzabilità dei risultati. Questi risultati sono stati ottenuti con Dexcom G6, non con Dexcom G7.
  2. Segnalazione dei pasti — DBLG2. Diabeloop / ViCentra, comunicato di lancio DBLG2–Kaleido–Dexcom G7 (in inglese), 10 luglio 2026, nota 2. Fonte della formulazione sulla segnalazione dei pasti; non è la fonte delle cifre cliniche riportate sopra.
  3. Uso dello smartphone e attività fisica — DBLG2. Manuale per l’uso di DBLG2 (in inglese), capitoli «Purpose and intended users» e «Physical activities». L’uso richiede uno smartphone compatibile e una formazione preliminare. Seguire le istruzioni per l’uso fornite con il sistema.
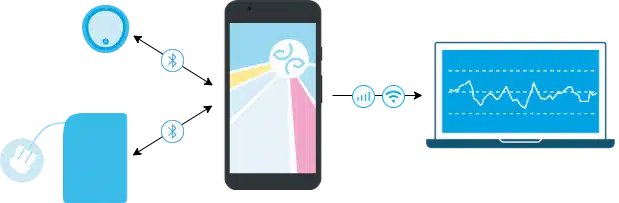
App DBLG202 · Analizzare Schermata di DBLG2 Demo su uno smartphone. Sensore di glucosio01 · Misurare il glucosio Pompa per insulina03 · Erogare l’insulina Letture
del glucosio
Comandi di
erogazione
I dispositivi comunicano con l’app tramite Bluetooth®. Sono illustrati i principali flussi di informazioni. Schermata di DBLG2 Demo.

Comprendere DBLG2

Come DBLG2 adatta
l’erogazione di insulina.

L’app DBLG2, un sensore di glucosio e una pompa per insulina lavorano insieme per adattare l’erogazione di insulina quando la modalità loop è attiva.

Consulti le indicazioni e le controindicazioni ↓
  1. Letture del glucosio ogni 5 minuti

    Le letture del suo sensore di glucosio compatibile vengono aggiornate nell’app ogni cinque minuti. DBLG2 rivaluta il fabbisogno di insulina a ogni nuova lettura.

  2. Un algoritmo che tiene conto delle sue esigenze

    DBLG2 tiene conto delle sue impostazioni personali, della glicemia attuale e prevista, dei pasti segnalati e delle attività fisiche.

  3. Regolazioni della basale e boli di correzione automatici

    La modalità loop aumenta o riduce la velocità basale, cioè l’erogazione di insulina di fondo. Quando c’è un rischio di glicemia alta, può anche inviare alla pompa boli di correzione automatici, tenendo conto dell’insulina ancora attiva nell’organismo.

Quando è prevista una glicemia bassa: la modalità loop può sospendere temporaneamente l’erogazione di insulina e raccomandare carboidrati di emergenza.

La sua glicemia target personale.

Il livello di glucosio che DBLG2 utilizza come riferimento per l’erogazione di insulina.

Valore predefinito

110 mg/dL

Valori target disponibili

100 – 130 mg/dL

Le impostazioni del trattamento devono essere riviste con l’operatore sanitario che ha prescritto il sistema.

Glicemia target e soglie: qual è la differenza?
DBLG2 con Dexcom G7. Tutti i valori sono espressi in mg/dL.
ImpostazionePredefinitoIntervallo disponibileRuolo
Glicemia target110100–130Orienta le regolazioni dell’erogazione di insulina.
Soglia di ipoglicemia7060–85Utilizzata per la gestione della glicemia bassa. Un calo previsto al di sotto di questa soglia può comportare una sospensione temporanea dell’insulina e la raccomandazione di carboidrati di emergenza.
Soglia di iperglicemia180170–220Modifica il modo in cui viene visualizzata la glicemia alta. Non determina l’erogazione di insulina; la modalità loop utilizza i propri meccanismi decisionali.

La glicemia target non è un intervallo di tempo nel range. L’intervallo 70–180 mg/dL utilizzato per il tempo nel range è diverso dalla glicemia target personale che orienta l’algoritmo.

Pasti, attività fisica, modalità Zen e modalità Notte

Pasti: una distinzione importante

La segnalazione dei pasti aiuta DBLG2 ad adeguare l’erogazione di insulina alle sue esigenze. Un bolo pasto suggerito richiede la sua conferma; per un bolo in due parti, solo la prima parte deve essere confermata. Senza segnalazione dei pasti, la gestione automatizzata della glicemia continua, ma il controllo glicemico può essere meno ottimale.

Attività fisica

La segnalazione dell’attività fisica aiuta la modalità loop ad adattare la gestione prima, durante e dopo l’esercizio. Può regolare la velocità basale e/o i boli di correzione e, se necessario, raccomandare carboidrati di emergenza.

Modalità Zen: un target temporaneamente più alto

La modalità Zen aumenta la glicemia target di 20 mg/dL per impostazione predefinita. L’aumento può essere impostato tra 10 e 40 mg/dL, con un target risultante massimo di 150 mg/dL. Durata: da 1 a 8 ore, 3 ore per impostazione predefinita. Anche la soglia di ipoglicemia aumenta di un valore fisso di 20 mg/dL.

Modalità Notte: notifiche meno invasive

La modalità Notte modifica le condizioni di attivazione di alcuni allarmi e avvisi durante un periodo notturno definito. Non introduce una glicemia target notturna separata.

Indicazioni e informazioni di sicurezza importanti

Per il DBLG2 System Android con una pompa per insulina compatibile e Dexcom G7, come descritto nel manuale per l’uso fornito con il suo sistema. Verifichi con il suo operatore sanitario se il sistema è adatto a lei.

Indicazioni

Il DBLG2 System, rilasciato su prescrizione medica, è destinato a pazienti affetti da diabete di tipo 1 di età superiore ai 18 anni.

Il fabbisogno insulinico totale giornaliero richiesto deve essere inferiore a 90 unità (U).

Il DBLG2 System è indicato per l’uso con l’analogo dell’insulina ad azione rapida da 100 U/ml ed è destinato all’uso su un solo paziente.

Formazione prima dell’uso. I pazienti devono ricevere una formazione sull’uso del sistema da parte di un operatore sanitario competente e/o del distributore. Leggere il manuale per l’uso prima di iniziare a utilizzare il sistema.

Controindicazioni

Questo dispositivo medico è controindicato per le seguenti persone:

  • Pazienti che ricevono una dose totale giornaliera di insulina inferiore a 8 unità.
  • Pazienti affetti da una malattia grave o sottoposti a un trattamento che potrebbe compromettere significativamente la fisiologia del diabete (ovvero interazioni glicemia-insulina) e che potrebbe interferire con il dispositivo medico (ad esempio trattamento irregolare con steroidi).
  • Pazienti con gravi problemi di udito non corretti e/o gravi problemi di acuità visiva non corretti.
  • Pazienti incapaci di comprendere ed eseguire tutte le istruzioni fornite da Diabeloop SA.
  • Pazienti che non vogliono o non sono in grado di mantenere i contatti con l’operatore sanitario.
  • Pazienti che vogliano usare una qualsiasi insulina diversa dall’analogo dell’insulina ad azione rapida 100 U/ml (ad esempio insulina regolare; analogo dell’insulina ad azione prolungata; analogo dell’insulina ad azione rapida 200 U/ml).
  • Pazienti che non sono in grado di utilizzare le funzioni di base di uno smartphone.

Popolazioni non testate o approvate

La sicurezza e l’efficacia del DBLG2 System non sono state testate o approvate per le seguenti categorie di persone:

  • Pazienti con diabete di tipo 2.
  • Pazienti con diabete altamente instabile.
  • Pazienti con diabete gestazionale.
  • Donne in gravidanza con diabete di tipo 1.
  • Pazienti il cui pancreas è stato rimosso o non funziona affatto.
  • Pazienti con funzione renale gravemente alterata (clearance della creatinina <30 mL/min).
  • Pazienti con una ridotta percezione dei sintomi di ipoglicemia.
  • Pazienti con trapianti di isole pancreatiche/pancreas.
  • Pazienti in dialisi.
  • Pazienti gravemente malati.

Dexcom G7: RM, TC e diatermia

Non sicuro per la RM. Non indossare alcun componente del Dexcom G7 durante la risonanza magnetica (RM) o il trattamento con calore elettrico ad alta frequenza (diatermia). In caso di tomografia computerizzata (TC), il manuale per l’uso specifica che il sensore deve essere tenuto fuori dall’area esaminata e coperto con un grembiule di piombo durante l’esame.

I campi magnetici e il calore potrebbero danneggiare i componenti del Dexcom G7, causando letture del sensore non esatte o impedendo l’emissione degli avvisi. Senza letture o avvisi, si potrebbe non rilevare un grave evento di ipoglicemia o iperglicemia. Seguire tutte le istruzioni specifiche del dispositivo riportate nel manuale per l’uso.

Questa sezione non sostituisce il manuale per l’uso completo, le sue avvertenze e precauzioni o la formazione sul sistema.

Trovi il manuale per l’uso del suo sistema (in inglese)

Fonte: manuale per l’uso di DBLG2 (in inglese), capitoli «Purpose and intended users» e «Safety statements».

Sistemi compatibili

Che cosa serve per utilizzare DBLG2

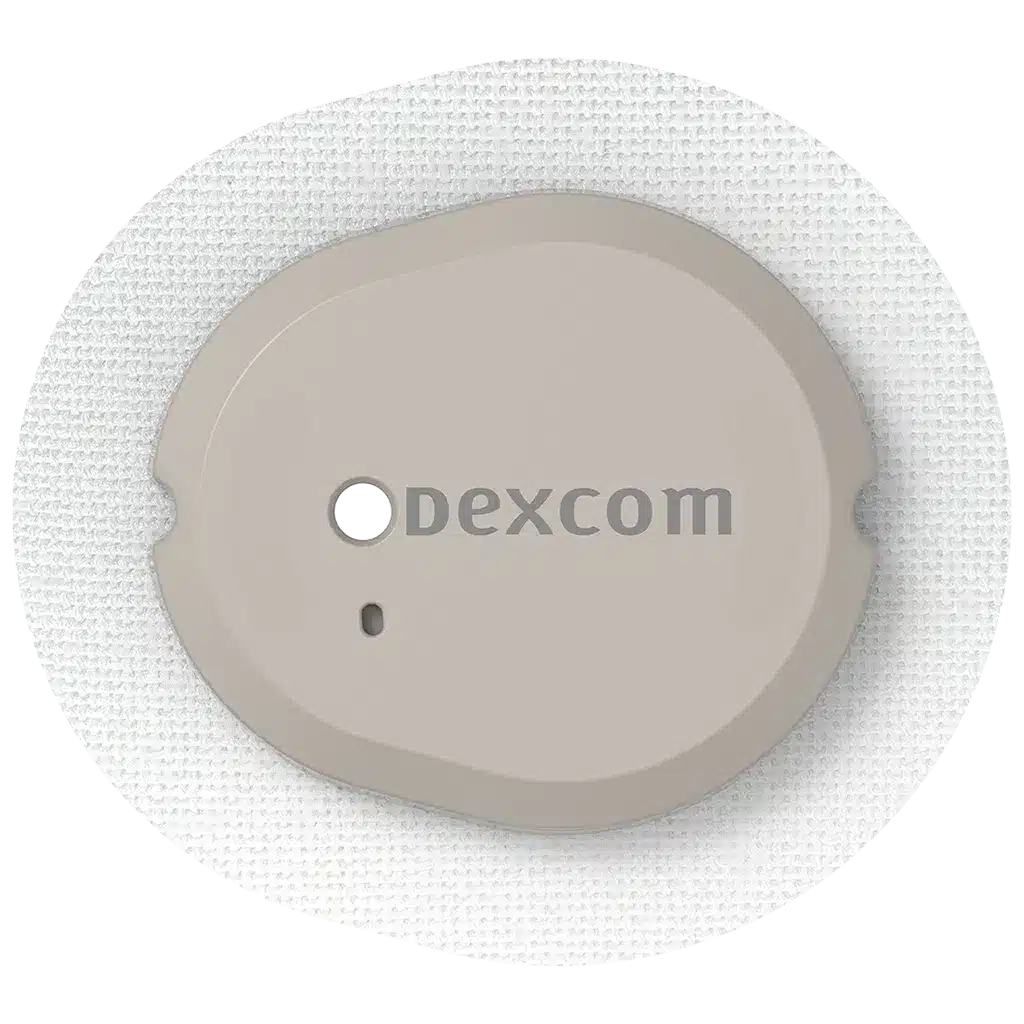
Sensore di glucosio Dexcom G7

Sensore di glucosio

Dexcom G7

Misura il glucosio in continuo e invia le letture a DBLG2.

Scopra Dexcom G7
Pompe per insulina Kaleido in argento e turchese

Pompa per insulina

Kaleido

Eroga l’insulina in base alle regolazioni calcolate da DBLG2.

Scopra Kaleido

Pompa per insulina

Dana-i

Già compatibile con DBLG1.
Integrazione con DBLG2 in corso.

Scopra Dana-i

Le illustrazioni non sono in scala.

La compatibilità e la disponibilità dei dispositivi dipendono dal paese e dalla configurazione del sistema. Consulti il manuale per l’uso di DBLG2 applicabile per i componenti supportati.

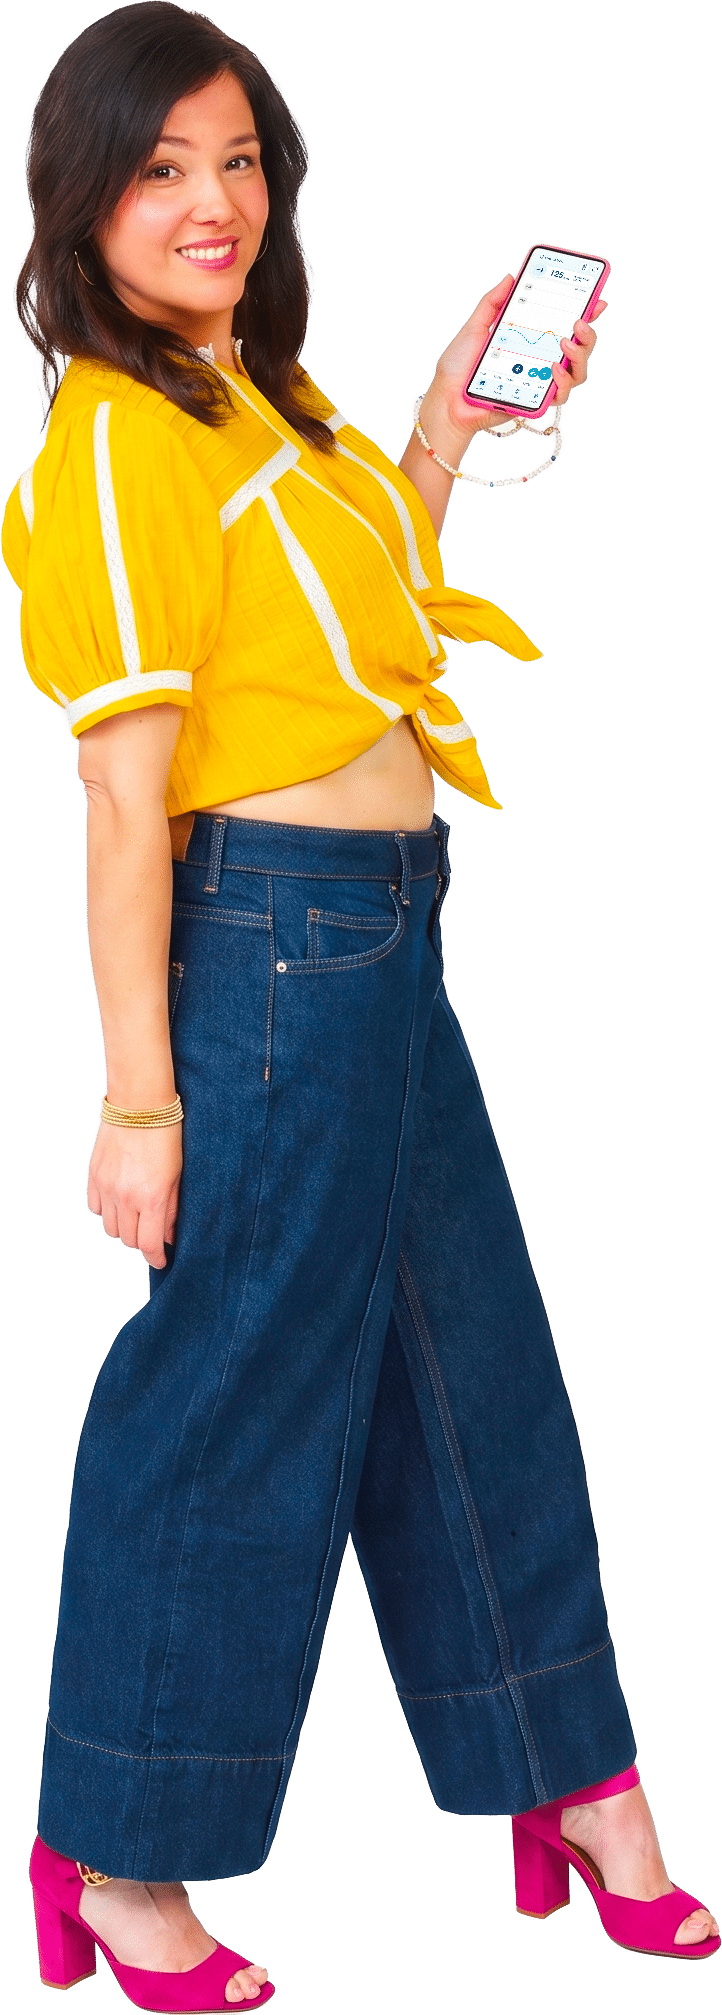
Donna che tiene in mano uno smartphone con l’app DBLG2

La community Diabeloop

DBLG2 System™
Parte di una community
in crescita.

Dietro Diabeloop ci sono persone, esperienze e vite quotidiane. DBLG2 porta l’erogazione personalizzata di insulina su uno smartphone compatibile.

Conosca la nostra community
15.000+Utenti cumulativi di DBLG1 e DBLG2
in Europa.

I dati del suo diabete.
Condivisi con le persone vicine.

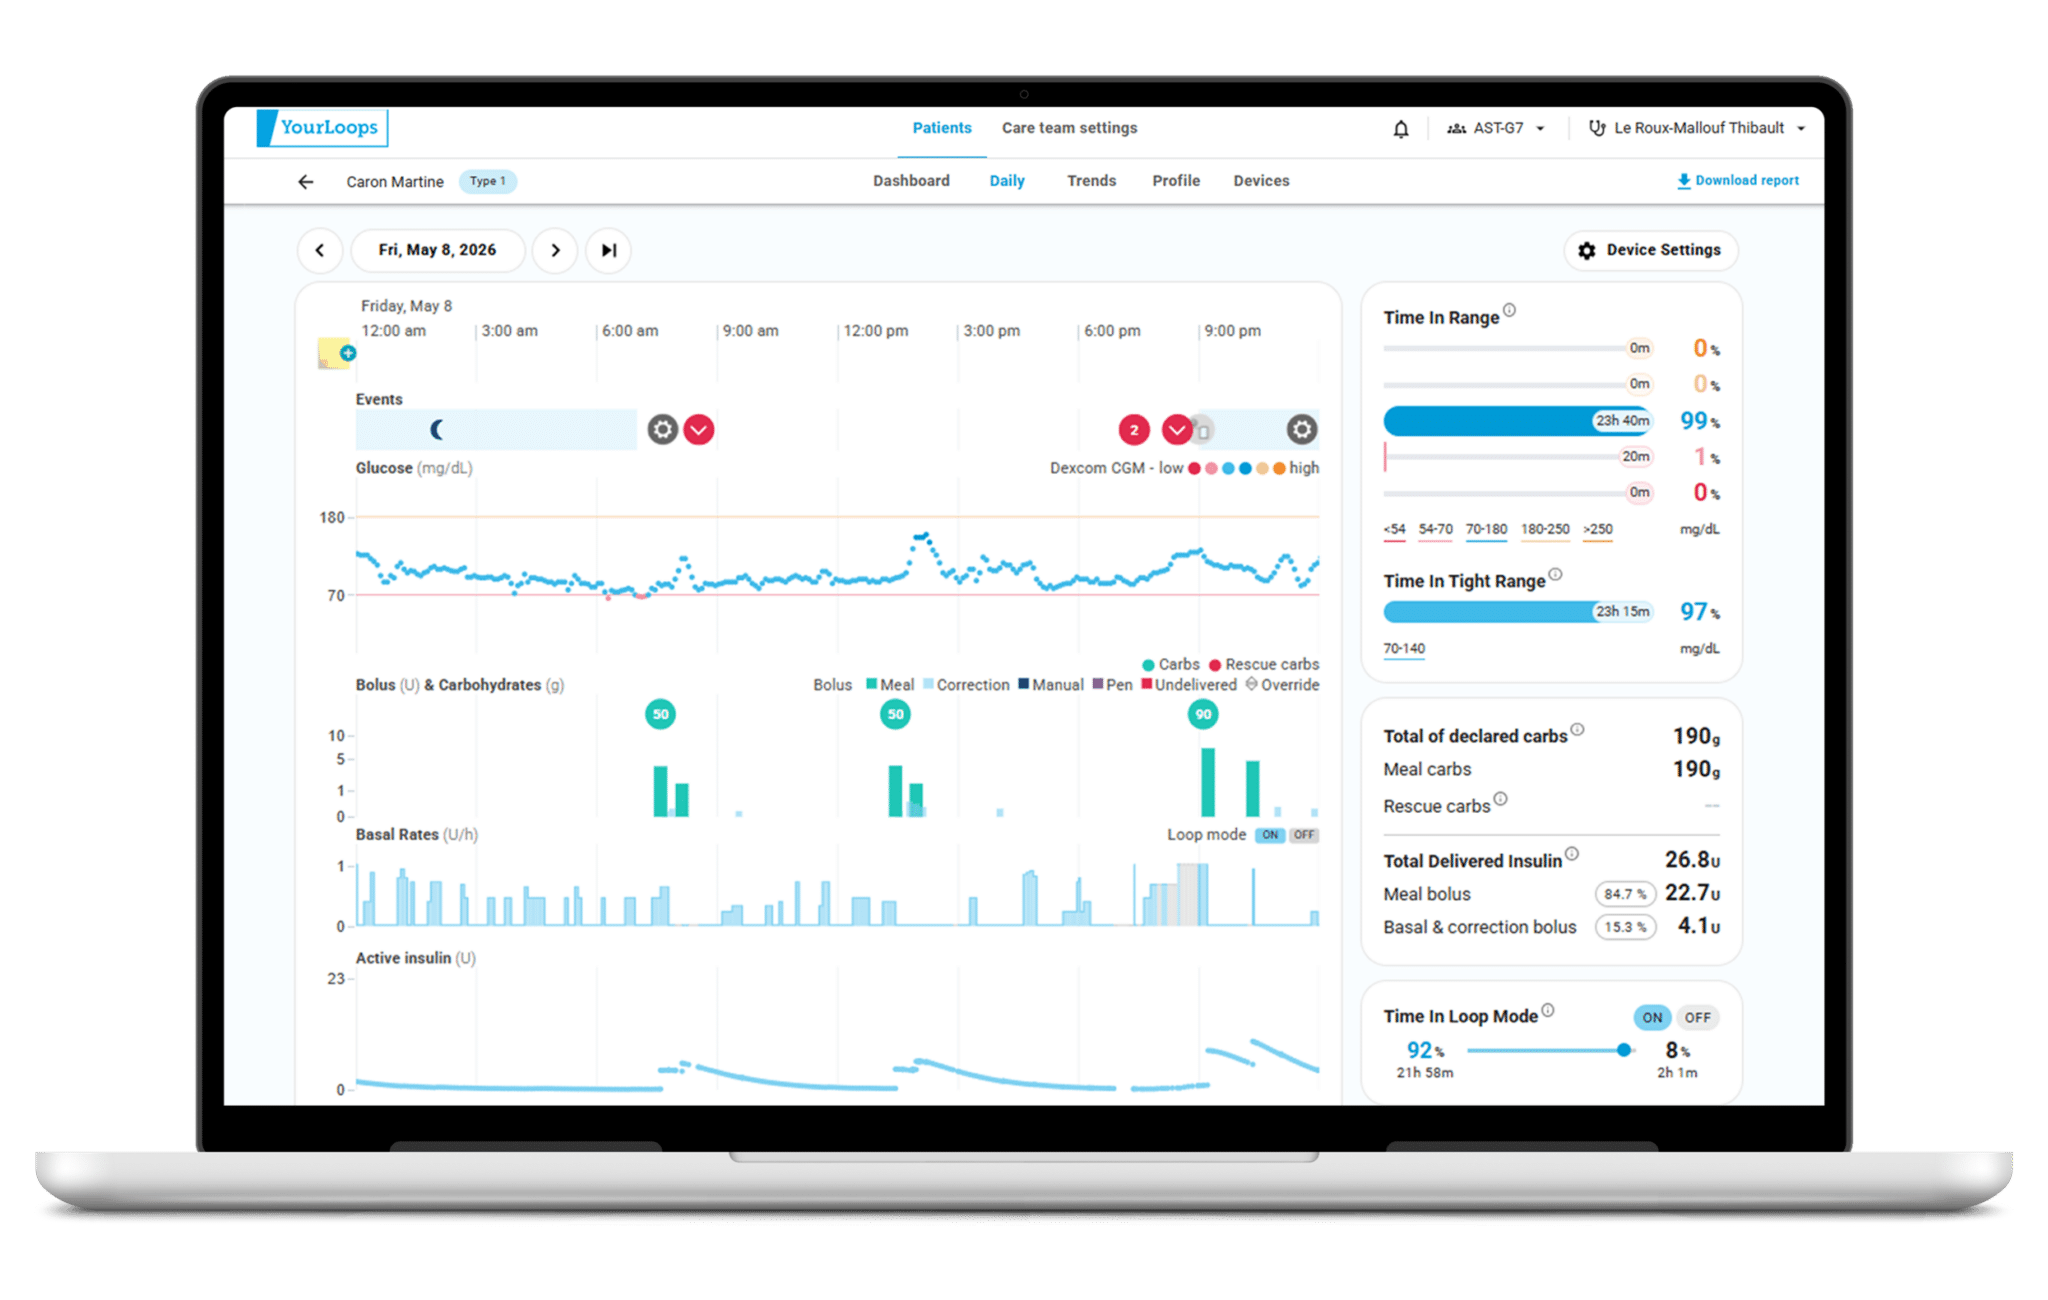
Riunisca glucosio, insulina ed eventi quotidiani. YourLoops la aiuta a consultare i dati di DBLG1 o DBLG2 e a condividerli con le persone che sceglie: il suo team di cura, la sua famiglia o i suoi amici.

Dashboard di YourLoops su un computer portatile
Illustrazione dell’interfaccia. I valori mostrati non sono risultati di studi clinici.

Per chi utilizza DBLG1 o DBLG2

Veda la sua giornata.
Comprenda le sue tendenze.

  • Metta i suoi dati nel contesto. Consulti glucosio e insulina insieme ai pasti e alle attività fisiche registrati.
  • Prepari le sue visite. Esamini la sua cronologia e le sue tendenze per parlarne con il suo team di cura.
  • Scelga chi ha accesso. Inviti le persone di cui si fida e revochi il loro accesso quando vuole.

Per familiari e amici

Restare vicini
a una persona cara.

  • Veda i dati condivisi con lei. Una volta invitato, acceda ai dati sul diabete della persona cara dal suo account personale.
  • Veda più di un valore di glucosio. Consulti le tendenze condivise e gli eventi registrati per comprendere la sua quotidianità.
  • Utilizzi un account dedicato. In YourLoops, questo tipo di account si chiama account «Caregiver». La persona che condivide i dati mantiene il controllo del suo accesso.

Per gli operatori sanitari

Una visione condivisa
per il follow-up.

  • Abbia un quadro completo. Acceda ai dati condivisi su glucosio e insulina, ai grafici e agli eventi registrati per preparare le visite.
  • Riunisca i dati degli utenti. Acceda alle cartelle degli utenti che condividono i dati con lei o con il suo team di cura.
  • Lavori con i suoi colleghi. Crei un team di cura, inviti altri professionisti e gestisca l’accesso del team tramite i permessi di amministratore.

La condivisione inizia da lei.

Coinvolga una persona di fiducia.

  1. Lei invita.Invii un invito via e-mail tramite YourLoops.
  2. La persona si collega.Accetta l’invito con il proprio account.
  3. Lei decide.Interrompa la condivisione quando vuole.

Caricamento automaticoCon una connessione internet e il trasferimento dei dati attivato.

Nessun software da installareApra YourLoops nel suo browser web.

Dati sanitari protettiDati crittografati. Hosting certificato ai sensi della normativa francese sui dati sanitari.

Per consultare i dati e le tendenze a lungo termine. YourLoops non è destinato ad azioni immediate né a sostituire il parere del suo operatore sanitario. La disponibilità dei dati dipende dalla connettività e dalle impostazioni di trasferimento dei dati.

Donna sorridente con una giacca blu con cappuccio

Per saperne di più

Vuole saperne di più
su DBLG2?

Scopra nel dettaglio il DBLG2 System e le sue funzioni.

Attualmente, il DBLG2 System™ è disponibile solo in Germania e nei Paesi Bassi.Disponibile solo su prescrizione medica.

Support & guides

How can we help?

Find answers about DBLG2 and YourLoops, from getting started to everyday use.

Loopy, Diabeloop support mascot

DBLG2 & YourLoops

Browse the questions below.

DBLG2 DBLG2 system overview

What is DBLG2?

DBLG2 is a medical device for adult patients with type 1 diabetes, available on prescription only.

DBLG2 is a mobile application for automated insulin delivery. The software includes an algorithm called loop mode and interacts with a continuous glucose monitoring device (CGM) and an insulin pump through restricted Bluetooth® Low Energy connections.

DBLG2, Dexcom G7 sensor and Kaleido pump

DBLG2 System is a CE-marked medical device

CE 0123

In which countries is DBLG2 available?

DBLG2 is available with the Kaleido insulin pump and the Dexcom G7 in Germany and the Netherlands.

What are the indications for use of the DBLG2 system?

The DBLG2 system, issued on a medical prescription, is intended for patients with type 1 diabetes who are more than 18 years of age.

The total daily dose of insulin required must be less than 90 units (U).1

The DBLG2 system is indicated for use with 100 U/mL rapid-acting insulin analog and is intended for single-patient use.

Your Kaleido pump and insulin cartridges are only approved for use with Humalog® and NovoRapid® U100 insulins.

1 U: Unit (International Unit, also IU). Unit of measurement for insulin.

What are the contraindications?

This medical device is contraindicated for the following people.

  • Patients receiving a total daily dose of insulin lower than 8 units.
  • Patients suffering from a serious illness or undergoing treatment that might significantly impair diabetes physiology (i.e., glucose-insulin interactions) and which might interfere with the medical device (for example, irregular treatment by steroids).
  • Patients with severe uncorrected hearing impairment and/or severe uncorrected problems of visual acuity.
  • Patients who are unable to understand and perform all of the instructions provided by Diabeloop SA.
  • Patients who are unwilling or unable to maintain contact with the healthcare professional.
  • Patients wanting to use any insulin that is not 100 U/mL rapid-acting insulin analog (for example, regular insulin; long-acting insulin analog; 200 U/mL rapid-acting insulin analog).
  • Patients who are unable to use basic smartphone functionalities.

No MRI/CT/diathermy — MR unsafe: do not wear any Dexcom G7 component during magnetic resonance imaging (MRI) or high-frequency electrical heat (diathermy) treatment. However, it is safe to have a CT scan if you keep the sensor out of the scanned area and cover the sensor with a lead apron during the scan. The Dexcom G7 has not been tested in those situations when used during an MRI scan, diathermy, or in the scanned area of a CT scan. The magnetic fields and heat could damage components of the Dexcom G7, which may cause inaccurate sensor readings or prevent alerts. Without sensor readings or alerts, you might miss a severe low/high glucose event.

The safety and effectiveness of the DBLG2 system have not been tested or approved for the following categories of people.

  • Patients with type 2 diabetes.
  • Patients with highly unstable diabetes.
  • Patients with gestational diabetes.
  • Pregnant women with type 1 diabetes.
  • Patients whose pancreas has been removed or is not functioning altogether.
  • Patients with severely altered renal function (creatinine clearance <30 mL/min).
  • Patients with a decreased feeling of hypoglycemia symptoms.
  • Patients with islet/pancreas transplants.
  • Patients on dialysis.
  • Critically ill patients.

DBLG2 Download and compatibility

How do I download the DBLG2 app?

You can download the DBLG2 app through the official app store, provided that you have a compatible smartphone (list available on Diabeloop's web site) with a compatible OS version, a medical prescription and an activation code.

Where can I find the list of compatible phones?

DBLG2 is compatible with Android phones.

The list of compatible phones is available on Diabeloop's web site.

Which operating systems (OS) is the DBLG2 app compatible with?

The DBLG2 app is compatible with Android operating systems 13 to 17.

Can the app be used on two phones?

No, the app cannot be used on two phones.

You can switch phones and reinstall the app on a new phone. However, installing the app on another phone will automatically deactivate the app on the original phone.

Can the app be used on a tablet?

No, the app cannot be used on a tablet.

Can the Dexcom G7 app be used at the same time?

No, the Dexcom G7 app cannot be used when you use the DBLG2 app.  If the Dexcom G7 app was previously installed on your phone, it needs to be uninstalled to avoid any conflict.

Can a caregiver download the app to view content?

No, a caregiver cannot download the app to view content. DBLG2 is a medical device and should not be used without a prescription.

YourLoops allows users to share data with caregivers and healthcare professionals.

Can a healthcare provider download the app to see how it works?

No, a healthcare provider cannot download the app to see how it works. DBLG2 is a medical device and should not be used without a prescription. 

A DBLG2 Demo app is available.

The DBLG2 Demo app is an interactive simulation and a preview of the DBLG2 automated insulin delivery system. It simulates interaction with the system and provides an overview of the many features and benefits of the DBLG2 system.

DBLG2 Initialization overview

What is meant by initialization?

Initialization refers to the app's setup. This is done after you've downloaded the app and is necessary to configure the app with your personal and medical information.

What are the prerequisites and information necessary to initialize the app?

To initialize the app, the following prerequisites and information are necessary.

  • You need a medical prescription for the DBLG2 app.

  • You need to be trained to use the DBLG2 system and assisted by a healthcare professional trained to use the DBLG2 system.

  • You need the activation code, provided by your healthcare professional or distributor after your training.

  • Your smartphone must be compatible (list of phones available on Diabeloop's web site) and use Android operating systems 13 to 17.

  • Before launching the DBLG2 app, you must make sure your smartphone is connected to the Internet (Wi-Fi or mobile network). There are no specific settings required for the phone other than an internet connection; all permissions will be requested during setup.

  • You will need to enter the following information:

    • Your email address (used to create your activation code)

    • The activation code provided by your healthcare professional or your distributor

    • Your personal information: name, date of birth, gender

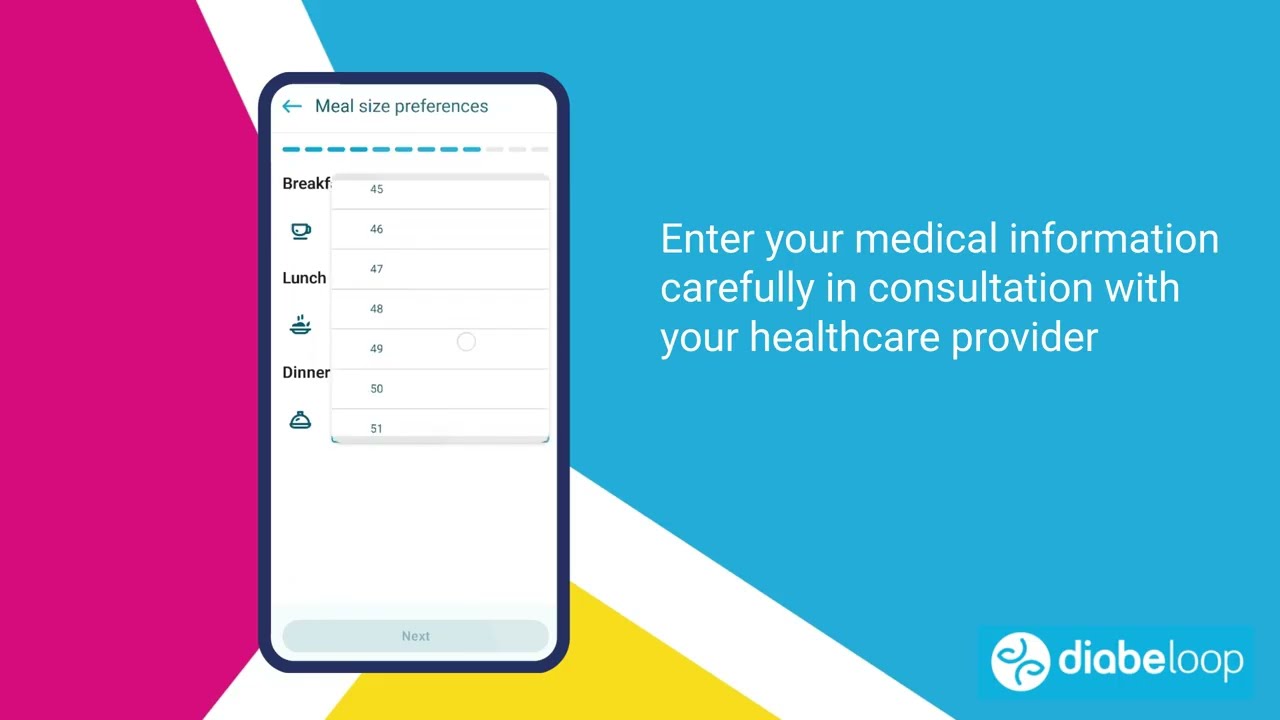
    • Your medical information (provided by your healthcare professional):

      • Weight, height and total daily dose of insulin (TDD)

      • Meal size preferences

      • Target and thresholds

      • Insulin type

      • Basal safety profile

How do I get an activation code?

The activation code required to use the system will be provided by your healthcare professional or distributor after you have received a prescription for the DBLG2 app and been trained on its use.

DBLG2 Initialization steps

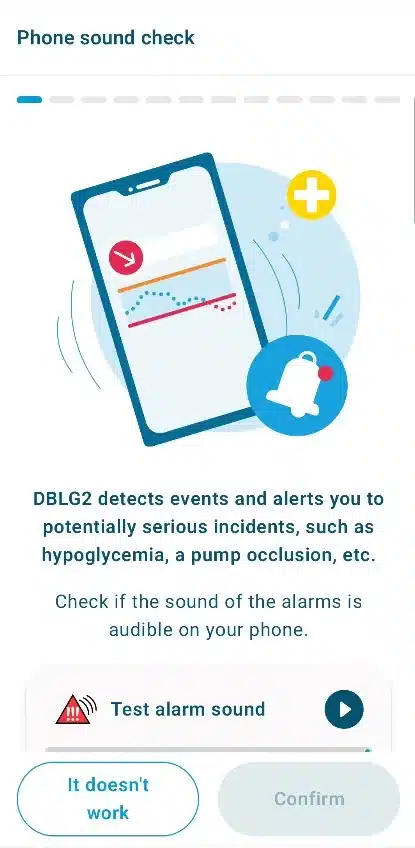
Why does the sound need to be tested?
DBLG2 app illustration: screen init sound check

The sound on your phone needs to be tested to ensure that alarms will be audible.

What should I do if the sound test doesn't work?

The phone's sound must be working to use DBLG2 safely.

When you run the sound test, wait until the progress bar is completely full to determine if you can hear the alarm. At first, the volume is very low and the phone vibrates, and then the volume increases.

If the sound doesn't work, you won't be able to continue with the app's initialization. You'll need another phone with working sound to set up DBLG2. The sound on your phone is critical so that you can hear safety alarms and react promptly.

What should I do if the Next button is grayed?

The Next button is greyed and becomes active once you've completed the required steps and scrolled to the bottom of the screen.

  • If you think you've filled in all the required fields, scroll to the bottom of the screen to activate the button.

  • If the Next button remains grayed, double-check the required fields. For the sound test, you must wait until the end of the test before you can tap Confirm.

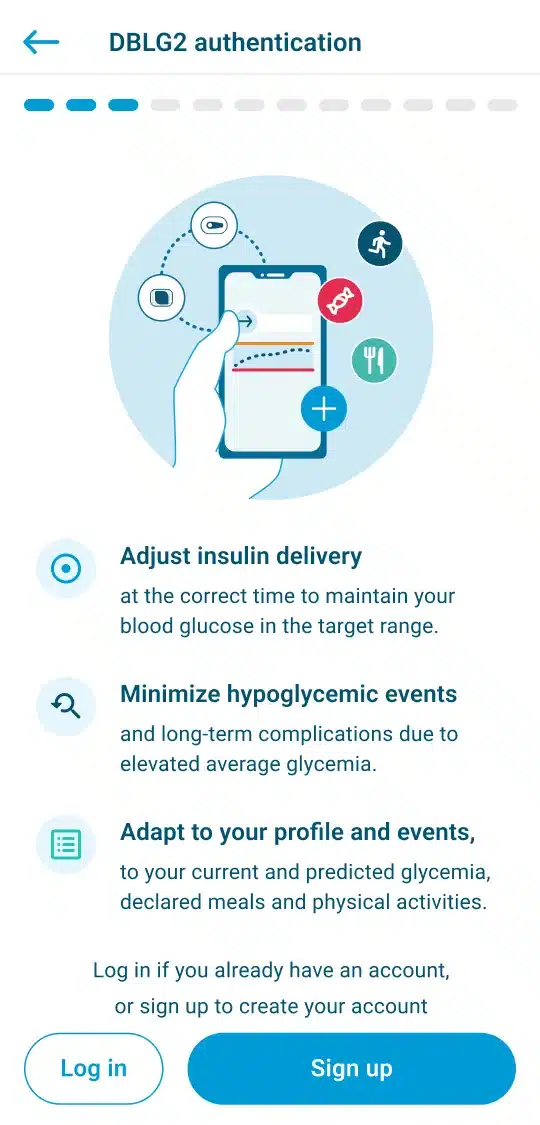
What's the difference between "login" and "signup"?
DBLG2 app illustration: screen init signup login

Tap Log in if you've already had a DBLG1 or already used DBLG2 and use your previous credentials.

  • These same credentials are used to log in to YourLoops.

  • If you can't remember your password, you can use the Reset password button. If you already have an account, you will receive instructions by email to reset your password.

Tap Sign up if you need to create an account.

When you tap Sign up, you will receive a link by email inviting you to check your email address. Once you've verified your account using the link in your email, go back to the app and continue.

In both cases, the email address should be the one used by your healthcare professional / distributor to generate your activation code.

What should I do if the activation code doesn't work?

If the activation code doesn't work:

  • Check your network.

  • Check your email address and activation code.

The distributor or healthcare professional who provided your activation code can check the email address and code.

  • If the email address used to log in / sign up is incorrect, you will need to restart initialization. You can uninstall the app and then reinstall it to remove the app's data and start over.

  • If the email address used to generate the activation code is incorrect, your healthcare professional or distributor can correct it so that the email/code combination works.

What types of insulin can be used with the DBLG2 system?

Your Kaleido pump and insulin cartridges are only approved for use with Humalog® and NovoRapid® U100 insulins.

Can the information entered during initialization be edited later on?

Yes, the information entered during initialization can be edited through the app's Profile menu.

How do I enable the required permissions?

When the app asks for a permission, tap Request. What happens next depends on your phone:

  • If a pop-up appears: tap Allow. Back in the DBLG2 app, tap Next to continue.

  • If your phone's settings open: find DBLG2 in the list of apps, turn on the permission named on the DBLG2 screen, then return to the DBLG2 app.

Why are some permissions required?

Some permissions are essential for the app to function safely and effectively.

  • Background operation: certain permissions prevent your phone from automatically shutting down the app. This ensures your continuous glucose monitoring remains active at all times. Turning off battery optimization for DBLG2 prevents your phone from stopping the app to save power.

  • Device connectivity: the app uses Bluetooth to communicate with your insulin pump and glucose sensor. Bluetooth must stay enabled for loop mode to receive glucose data and send insulin delivery instructions to your pump.

  • Safety alarms: notification and sound permissions allow you to see and hear safety alarms. These alarms warn you about serious incidents such as low blood sugar or pump issues so you can react promptly.

  • Data accuracy: permissions related to time settings ensure the app's history and insulin delivery logs are accurate.

Do not change any of these permissions after setup (initialization) as the app may trigger an alarm or its use may be blocked.

What should I be careful about before I start using the app?

DBLG2 Pairing the sensor

What are the key things to know before pairing a sensor?

Here are some key things to know before pairing your sensor.

  • When the Dexcom G7 is used with the DBLG2 app, it cannot be used with the Dexcom app. Make sure you uninstall the Dexcom app if you were using it before.

  • To pair the sensor with the app, you must accept a Bluetooth pop-up during the pairing process. 

  • Ensure that you keep a maximum distance of 10 meters between the sensor and your smartphone. Otherwise they may not be able to communicate.

How do I pair the sensor?

To pair the sensor, follow these steps.

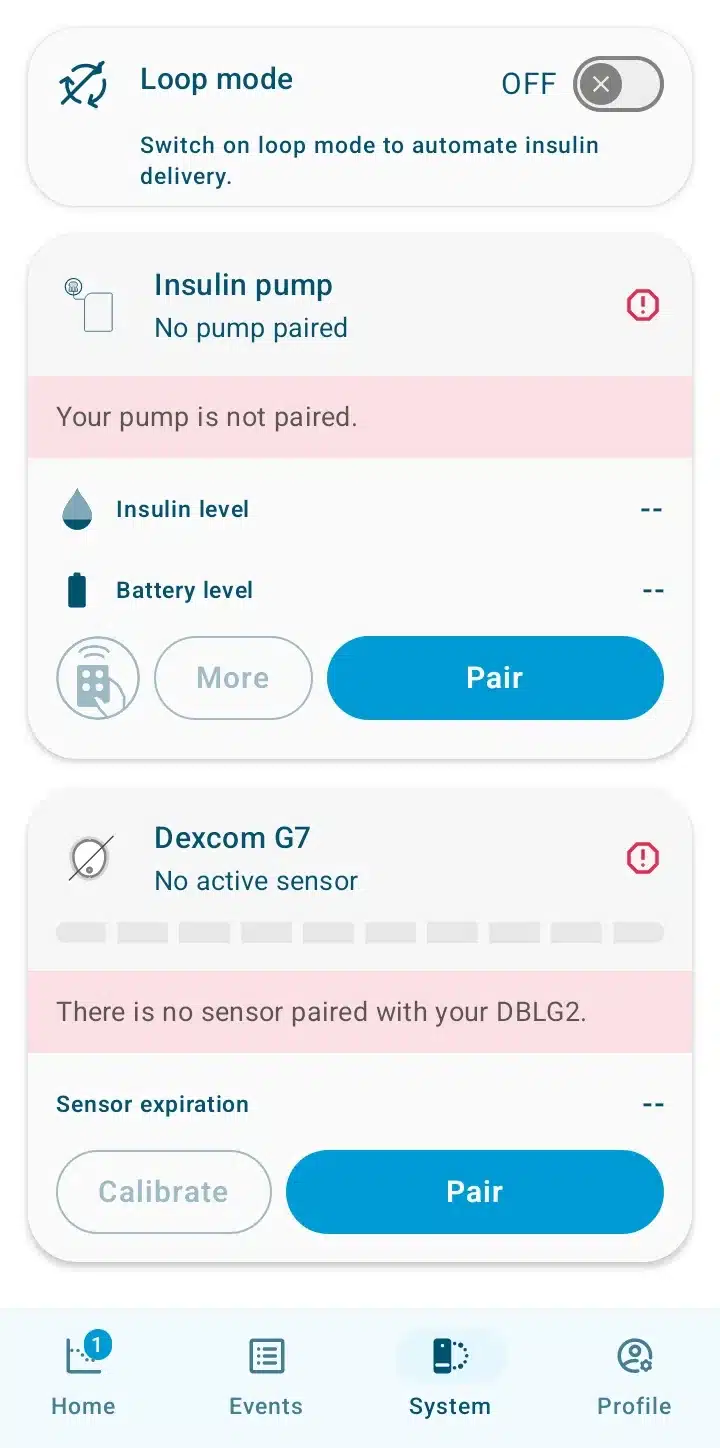
DBLG2 app illustration: screen system all OFF
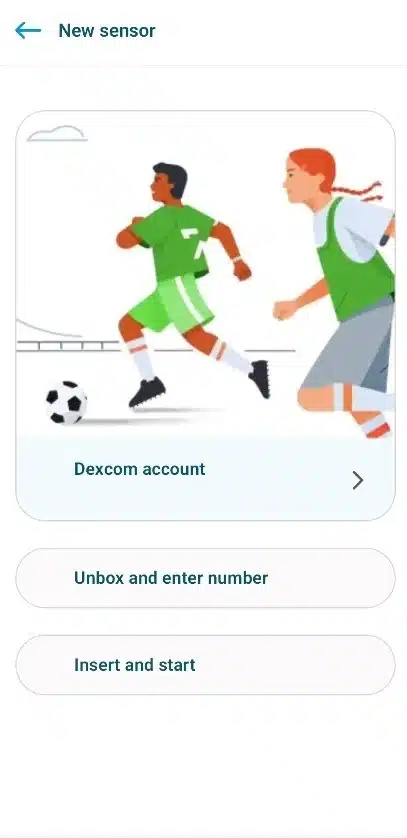
DBLG2 app illustration: G7 screen Dexcom account
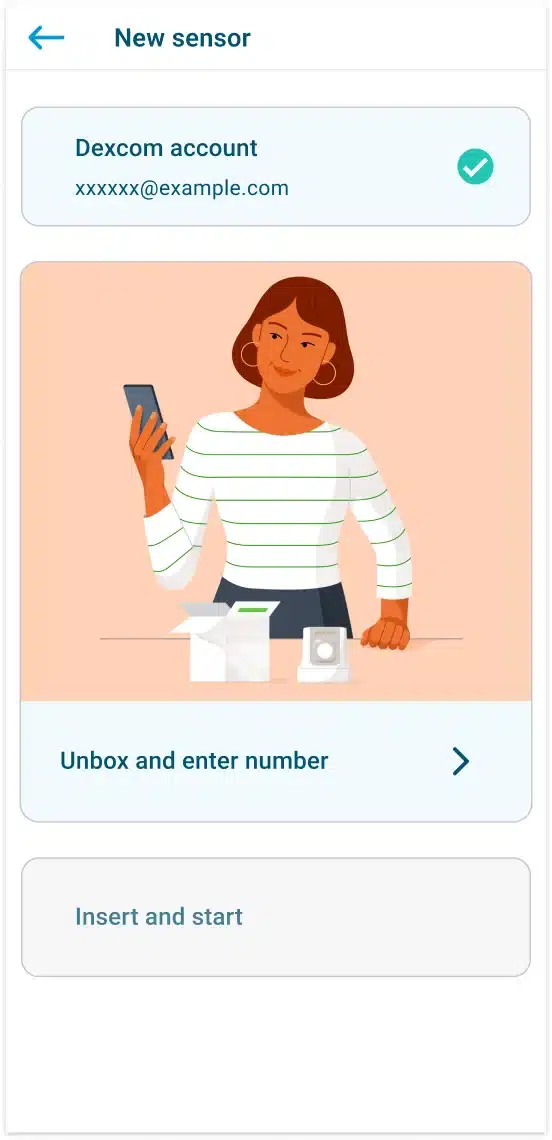
DBLG2 app illustration: G7 screen unbox enter number
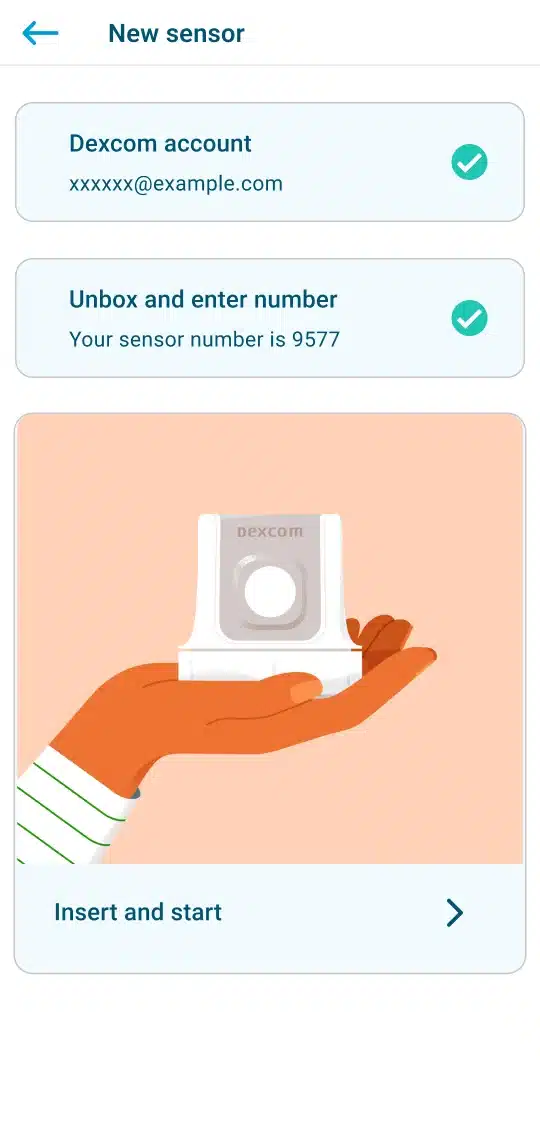
DBLG2 app illustration: G7 screen insert start sensor
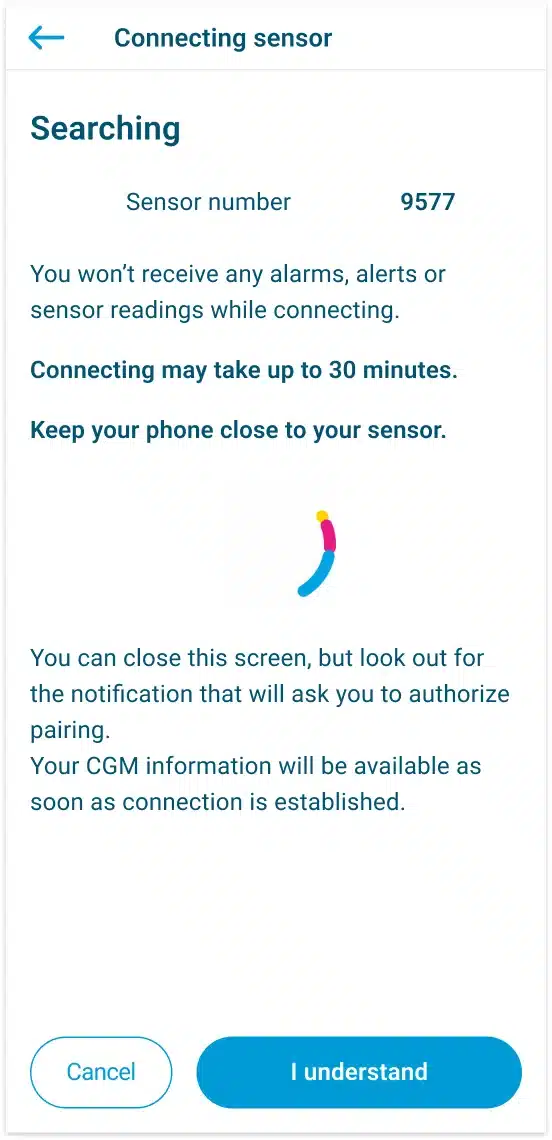
DBLG2 app illustration: G7 screen searching

In the Dexcom G7 section, tap on Pair.

Tap Dexcom account. Log in to your Dexcom account with your credentials or create an account. 

Tap Unbox and enter number. Enter the sensor number which is displayed on the applicator and tap Enter.

Tap Insert and start. Then proceed with inserting your sensor.

Start the sensor.

What should I do if I can't log in to my Dexcom account?

If you can't log in to your Dexcom account, you can reset your password from the login screen. 

If you still can't recover your Dexcom account, you can:

  • create a new account, or

  • contact Dexcom.

Where should I insert the Dexcom G7?

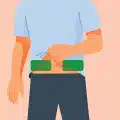
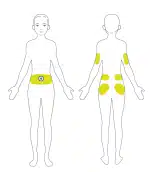
You can insert the Dexcom G7 on your abdomen or back of upper arms. The sensor is not tested or approved for other sites. Discuss the best site for you with your healthcare professional.

Dexcom G7 placement on the abdomen
Dexcom G7 placement on the upper arm

Avoid areas:

  • with loose skin or without enough fat to avoid muscles and bones.
  • that you lie on or brush against.
  • within 8 centimeters of an injection site.
  • near your waistband, irritations, scarring, tattoos, or lots of hair.
What should I do if the applicator won't detach after I've inserted the sensor?

If the applicator won't detach after having inserted the sensor:

  • gently peel off the adhesive patch with the applicator attached,

  • check the insertion site to make sure the sensor has not been left in the skin,

  • contact your healthcare professional.

Do not reuse the applicator.

What should I do if the pairing process fails?

If the sensor's pairing process fails:

  • make sure you don't have the Dexcom G7 app installed (and delete it if you do).

  • check the sensor code and try pairing again.

  • be sure to accept all permissions if you have permission requests.

  • be sure to confirm the Bluetooth pairing pop-up when it appears. If Bluetooth pop-up doesn't appear, temporarily disable Do Not Disturb mode if it was active. 

If you have experienced Bluetooth connectivity issues with other devices (headphones, etc.), reboot your phone and restart the pairing process.

Try pairing the sensor again, making at least three separate attempts. If pairing still fails, contact your distributor.

What do the various sensor statuses mean?

The following table describes the various sensor statuses that you can see in your app.

No active sensor

There is no sensor paired with your DBLG2 app, or the sensor has stopped.

Searching

DBLG2 is attempting to pair with your sensor.

Initializing

Your sensor is in its 30-minute warmup phase.

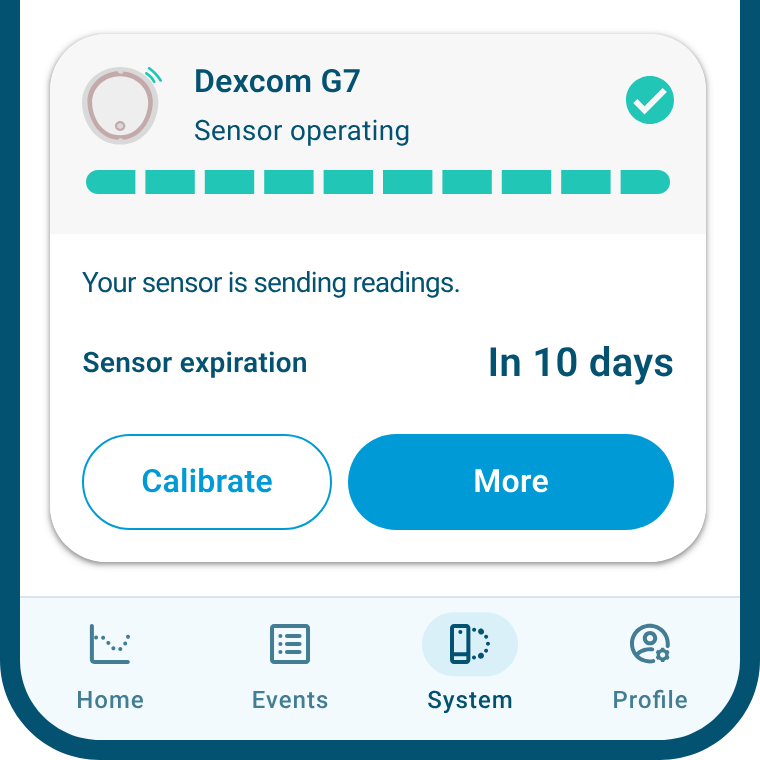
Sensor operating

Your sensor is operating normally and is sending readings.

Stopping sensor

You have just tapped Stop and the sensor is in the process of stopping. This may take several minutes.

Signal loss

Connection with the sensor has been momentarily interrupted. The Home screen displays the symbol (--).

No reading available

Your sensor is not providing readings. The Home screen displays the symbol ??? instead of a value.

How will I know when the sensor's warmup phase has ended?

To keep track of the sensor's warmup progress, a warmup countdown is displayed:

  • on the System screen in the sensor section, and

  • on the Home screen above the graph.

Once the warmup has finished, the countdown disappears, the Home screen will start displaying glycemia readings, and the sensor's status on the System screen will switch from Initializing to Sensor operating.

What should I do if the warmup phase takes longer than 30 minutes?

If the warmup phase takes longer than 30 minutes, try turning Bluetooth off, acknowledge the alarm and then turn Bluetooth back on. Wait for 10 minutes.

If there's still no progress after the 10 minutes, you should contact your distributor.

Are glucose readings provided during the warmup phase?

No, during the warmup phase, you will not receive G7 readings, nor alarms or alerts related to your glucose.

Remember, the sensor's warmup phase takes 30 minutes.

DBLG2 Pairing the pump

What are the key things to know before pairing a pump?

Here are some key things to know before pairing your pump.

  • Your app can only detect the pump if your phone is within 50 cm of the pump.

  • During pairing, you need to accept the pairing pop-up notification.

  • During pump pairing, the app asks you to confirm whether the cartridge and the infusion set are new and the size of the cannula before priming the cannula and starting insulin delivery.

What do I need to do to prepare the pump before pairing?

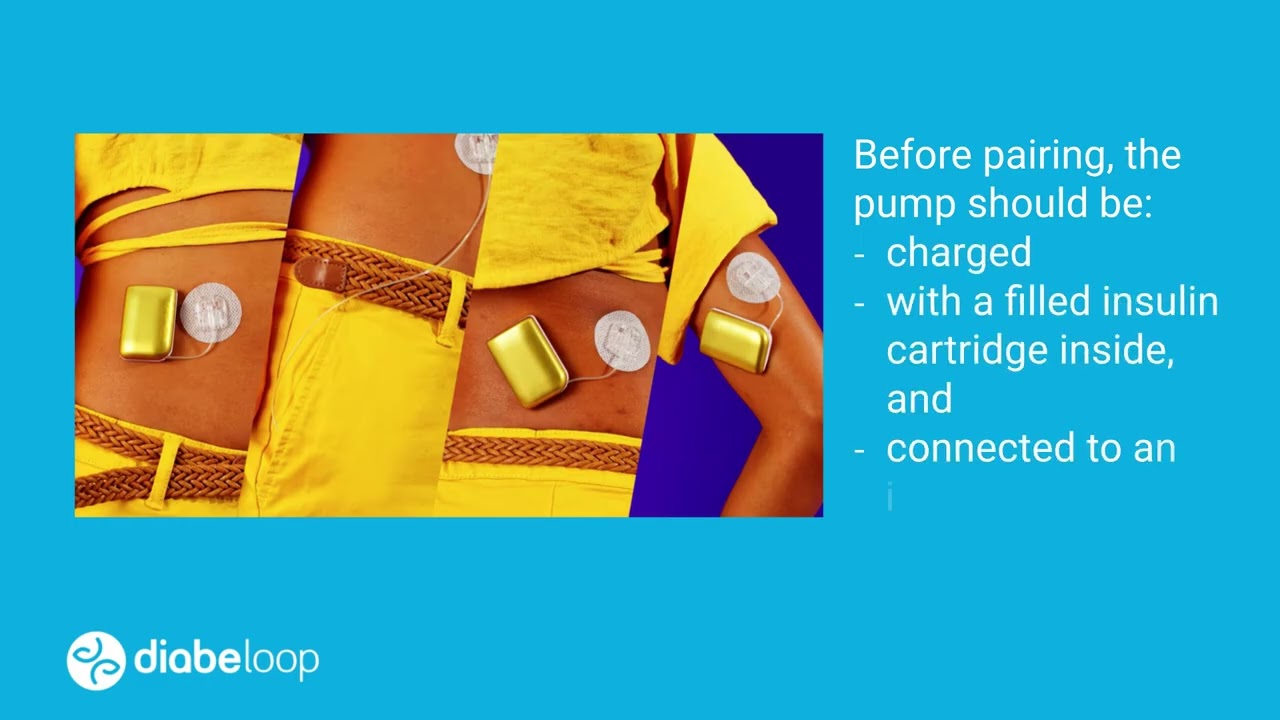
Before pairing your pump, you need to insert your infusion set under your skin, fill your insulin cartridge and connect your pump to your infusion set, as shown below.

Next step

Next step

Insert an infusion set

Fill the cartridge and then insert it into the pump. 

Inserting the cartridge into the pump activates the pump, making it ready for pairing with the DBLG2 app.

Connect the pump to the infusion device that's attached to the skin.

Where can I insert the infusion set?

You can insert the infusion set on your abdomen, back of the upper arms, upper buttocks or lower back.

Blood flow in the thighs can vary enormously, particularly during physical activity, and stable absorption of insulin that can be correctly interpreted by the algorithm cannot be guaranteed. This is why you can't place the pump on the thighs when using the DBLG2 system.

Infusion set placement sites

Avoid wearing your infusion set in the following areas or locations.

  • Highly sensitive areas
  • Under a waistband or tight clothing
  • Areas exposed to rubbing or bumping
  • Over a bone
  • Bruised skin or areas with burns or cuts
  • Blood vessels
  • 5 cm around the belly button
  • Scar tissue / surgical scars
  • Areas with fatty tissue overgrowth
  • Areas with body piercing
  • Tattoos
  • Moles
  • Blood spots / birthmarks
  • Any area that has tough/rough skin (as the cannula may not be inserted deep enough or may become kinked).
What should I do if I can't see my pump in the list of available pumps at the beginning of the pairing process?

Inserting an insulin cartridge turns the pump on and removing it turns the pump off. When inserted correctly, the pump will beep twice to indicate it's ready to connect to DBLG2.

If you can't see your pump in the list of pumps at the beginning of the pairing process, this means it's not available for pairing.

  1. Check that the pump is charged and has a cartridge inserted in the cartridge compartment.

    • Remove and reinsert the cartridge and check that the pump beeps twice after inserting the cartridge.

    • If the pump does not beep, check that the pump is fully charged, or charge it if this is not the case.

    • If no light is displayed on the charging dock, the pump may not have been properly disconnected from its previous controller / DBLG1. In this case:

      • connect the pump to the previous controller / DBLG1 and then follow the instructions to correctly stop and unpair the pump in accordance with the user guide provided to you.

      • wait at least 30 to 60 seconds after stopping the pump before removing the cartridge.

  2. Make sure the pump is close to your phone and restart the pairing process.

  3. Make sure you accept all the requested permissions.

If you still can't see your pump in the list after having done the above, contact your distributor.

What should I do if the pump is grayed out in the list of available pumps at the beginning of the pairing process?

If your pump is grayed out in the list of pumps at the beginning of the pairing process, this means it has become locked and therefore cannot be paired.

From the Profilescreen, go to Help and contact > Unlock your pump. Follow the instructions shown on the screen. Note that you have a limited time to carry out some of the steps.

  • A green check mark means the step has been carried out successfully.

  • A red one indicates that you have to try again.

  • If you see the colored circle going round endlessly during a specific step, tap the BACK arrow to exit the procedure, then try again from the beginning.

If the pump remains grayed out despite having followed the Unlock procedure to the end, contact your distributor.

What can I do if pairing fails?

If pairing of your pump fails, try again, making at least three separate attempts.

If you have experienced Bluetooth connectivity issues with other devices (such as earphones), restart your phone and then try pairing again.

If Bluetooth connectivity issues persist with all devices, the problem may be related to your phone. If Bluetooth connectivity issues persist with your pump, contact your distributor.

What do the various pump statuses mean?

The following table describes the various pump statuses that you can see in your app.

No pump paired

No pump is paired with the DBLG2 app; the app cannot send orders to the pump.

Connecting

Transient state when pairing your pump or when the pump and the DBLG2 app are paired but have momentarily lost connection and are reconnecting.

Priming

Transient state just prior to the pump delivering state.

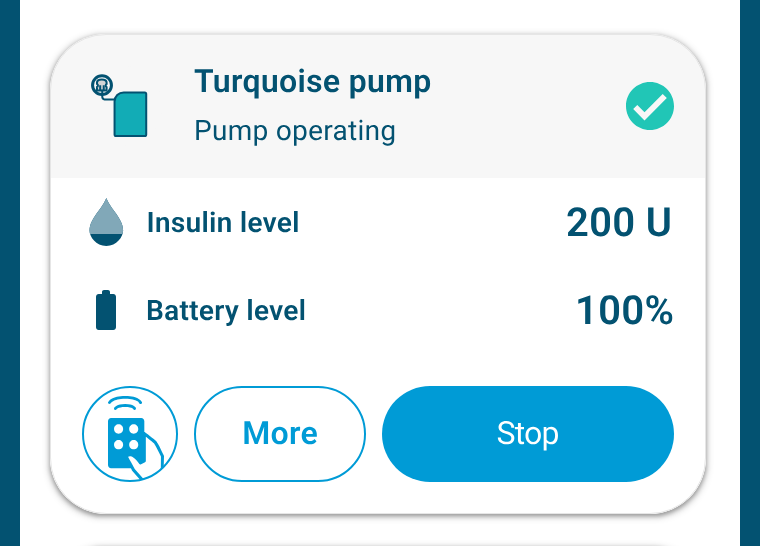
Pump operating

The pump is paired with the DBLG2 app. It is able to deliver insulin.

Pump stopped

The pump is no longer delivering insulin but is still paired with the DBLG2 app.

Shutting down

Transient state when your pump is being disconnected from the DBLG2 app.

Searching

The pump is no longer connected to the DBLG2 app. It is delivering the last command sent by loop mode before connection was lost. The pump should reconnect automatically within a few minutes.

DBLG2 Starting loop mode

What are the key things to know before starting loop mode?

Here are some key things to know before starting loop mode.

  • Your sensor and your pump must both be paired (loop mode comes last in the process).

  • Loop mode will be able to send recommendations once it has received enough glucose readings (after the 30-minute sensor warmup) and will be able to send commands to the pump once the pump has started. Make sure you start the pump!

What do the various loop mode statuses mean?

The following are the various loop mode statuses that you can see on your app's Home screen.

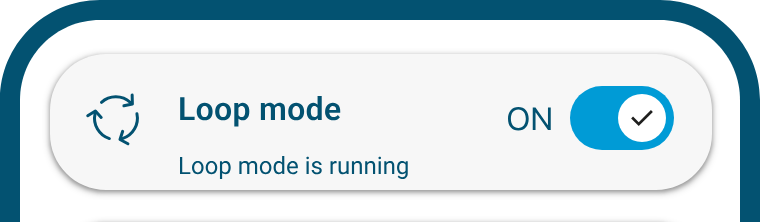
Loop mode running : loop mode is running.

Loop mode waiting : loop mode is waiting for glucose values or for the pump.

Loop mode off : loop mode is OFF. Switch on loop mode to automate insulin delivery.

DBLG2 Home

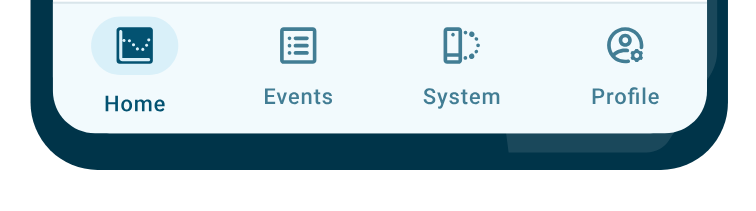
DBLG2 navigation bar
What information is displayed on the Home screen?

The Home screen displays various device statuses, your glucose levels and trends, insulin delivery information and events such as meals and physical activities. You can also access the add event button.

DBLG2 app illustration: Home1

System device status

DBLG2 app illustration: Home2

Latest glucose reading and trend arrow

DBLG2 app illustration: Home3

History of glucose values

DBLG2 app illustration: Home4

Events history

DBLG2 app illustration: Home5

Insulin delivery information

DBLG2 app illustration: Home6

Add event button

What does the badge on the Home icon mean?

Sometimes, a badge with a number on it may be displayed on the Home icon at the bottom of the screen. This means that one or more temporary messages or statuses are available for viewing in the upper part of the Home screen.

The types of messages typically displayed on the Home screen include:

  • Bolus delivery information

  • Sensor warmup countdown

  • Hyperglycemia or hypoglycemia event

  • Night mode, Zen mode activation, etc.

If you're on another screen, tap the Home icon to access the Home screen, then tap a second time on the Home icon to zoom in on the information displayed at the top of the screen, under the glucose value.

Why won't the badge on the Home icon go away?
The number on the Home icon disappears once the temporary message or status has disappeared.
How many days of history are displayed on the Home screen?
7 days of history are displayed on the Home screen.
How can I see the glucose value on the Home graph?

To see the glucose value at a specific time on the DBLG2 Home graph, long-press anywhere on the graph. To view each glucose value continuously, drag your finger across the graph.

These features are only available from version 1.3.0 of the DBLG2 app.

Can I change the scale of the Home graph?

Since DBLG2 version 1.3.0, you can change the scale of the Home graph. To change the scale, tap the maximum threshold on the graph, then choose the compact graph or the full range.

These features are only available from version 1.3.0 of the DBLG2 app.

DBLG2 Events

What's on the Events screen?

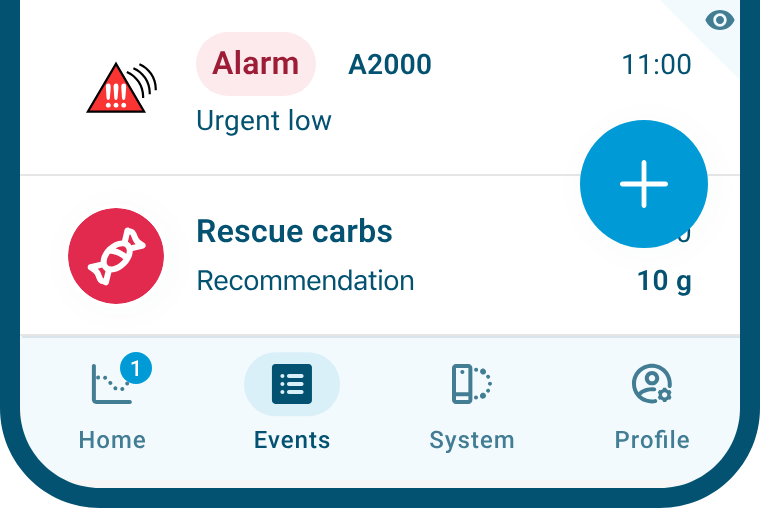
The Events screen displays events declared by the user or triggered by the system.

You can view information and – sometimes – edit events.

You can also access the add event button.

DBLG2 app illustration: Event1

Navigation

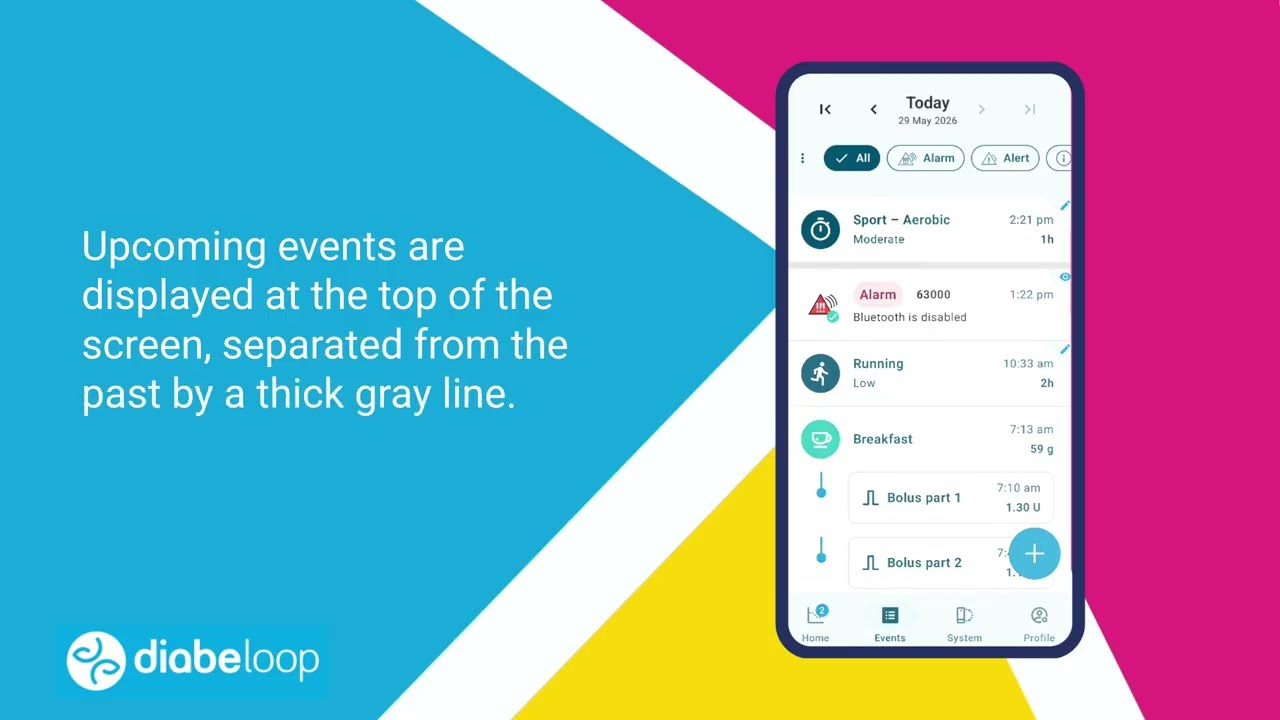
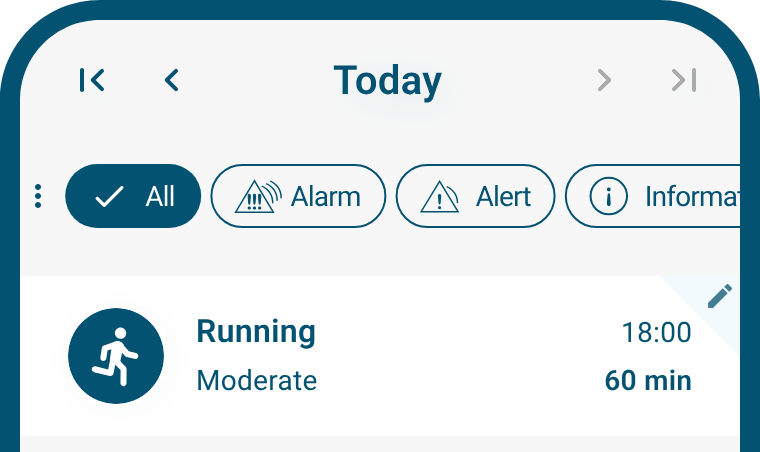
The day's events are displayed from the most recent (at the top) to the oldest (at the bottom). You can navigate through the days and filter your events by type.

Upcoming events are always displayed at the top of the screen and are separated from past events by a thick gray line.

DBLG2 app illustration: Event2

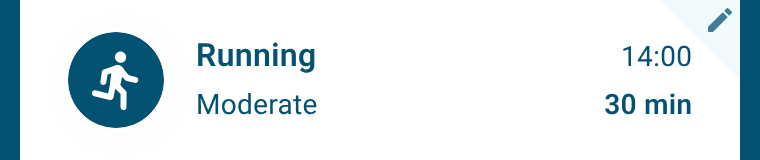
Events that can be modified are indicated by the icon Edit event. Tap on the event to edit it.

DBLG2 app illustration: Event3

Events without the icon Edit eventcannot be modified.

DBLG2 app illustration: Event4

Tapping on an alarm with the iconOpen details displays additional information about the alarm and actions to be taken to resolve the issue. 

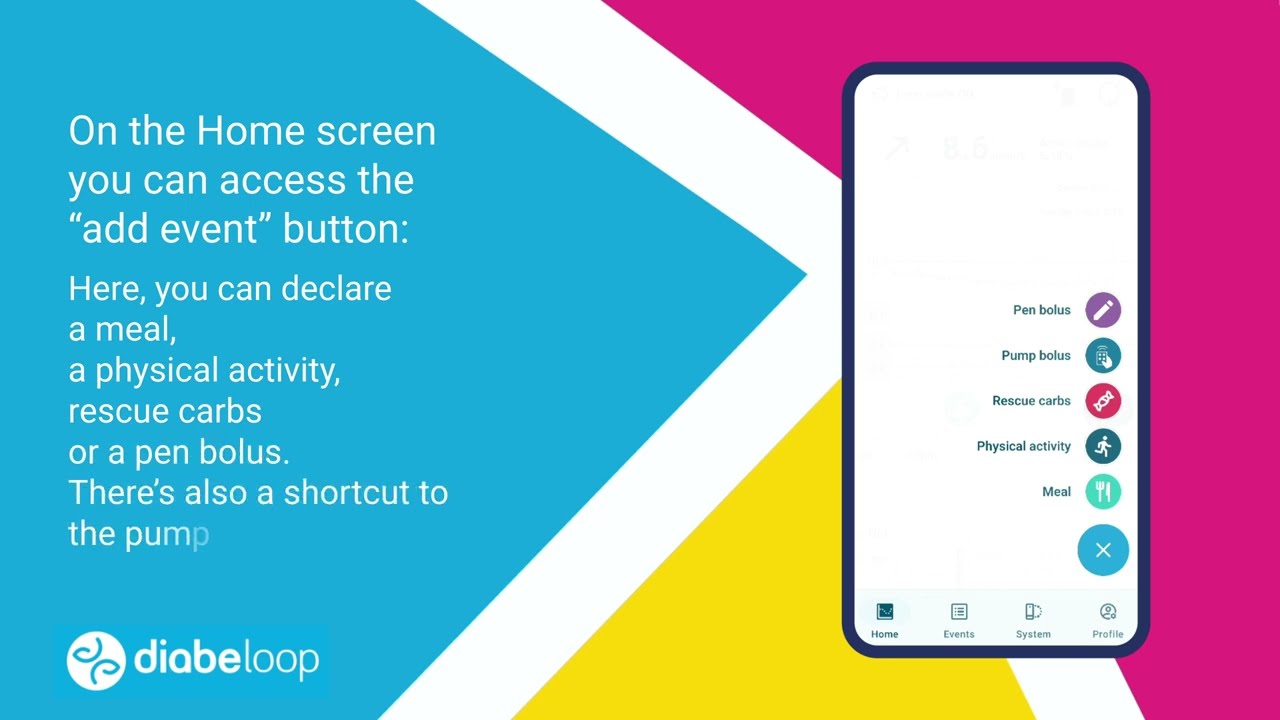
Add event button: e.g., declare a meal or some physical activity.

What types of events are displayed on the Events screen?

The Events screen displays:

  • Events that you've entered through the add event button Add event(e.g., meals, physical activities, rescue carb intakes, pump boluses through the pump control mode or pen boluses).

  • Events linked to orders given by loop mode to the pump or sensor, such as administered boluses or sensor calibrations. 

  • Events triggered by the system such as alarms, alerts or information messages, or meal boluses or correction boluses sent by the system.

How many days of history are displayed on the Events screen?
1 month of history is recorded on the Events screen. You can use the back and forward arrows at the top of the screen to navigate through the history.
Why do some alerts have a green check mark while others don't?

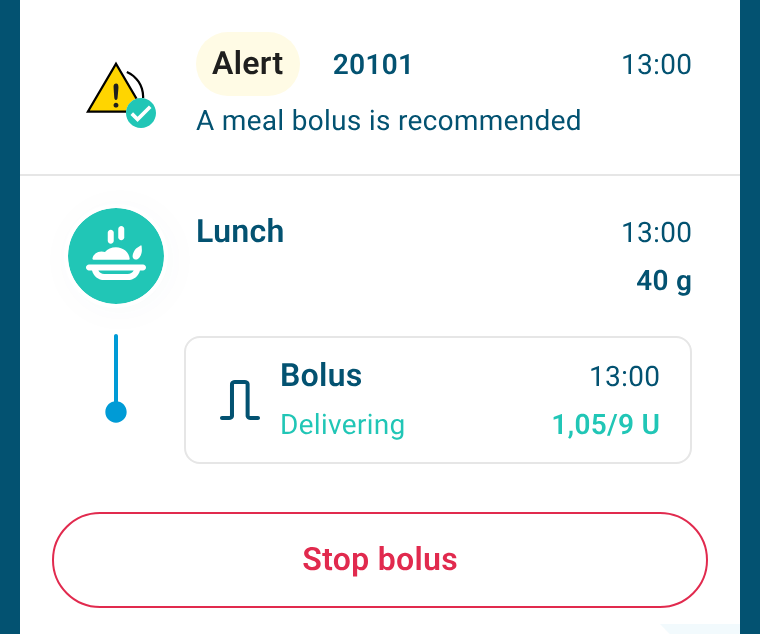
A green check mark can appear next to an alert in the list of events on the Events screen when you have tapped on the notification that gets displayed on your phone and acknowledged the alert (i.e., you have acknowledged the notification). An action may still be required on your part to resolve the issue.

An alert without a green check mark may have been automatically acknowledged by the system or may be pending.

Why are some meals no longer editable?

Some meals cannot be edited because a meal bolus recommendation has been confirmed for that meal. Even if the bolus was subsequently canceled / interrupted, the meal can no longer be edited.

A meal can be edited the same day ONLY if the associated meal bolus recommendation was NOT confirmed.

DBLG2 System

What's on the System screen?

The System screen allows you to control your devices and start automated insulin delivery.

DBLG2 app illustration: System1

Loop mode section

Activate or deactivate loop mode (automated insulin delivery).

DBLG2 app illustration: System2

Pump section

Pair or stop your insulin pump or control your pump manually Pump control.

DBLG2 app illustration: System3

Sensor section

Pair or change your sensor, calibrate your sensor.

When and how should I change my Dexcom G7 sensor?

The Dexcom G7 sensor lasts 10 days, followed by a 12-hour grace period that gives you time to replace it. DBLG2 informs you when it is time to change your sensor.

It is best to replace your sensor during the grace period and before alarm A1000 is triggered. This way, loop mode is not interrupted.

You can choose when you receive the A0118 reminder (Grace period expires soon), and set it to always sound even in silent mode, in Profile > Notifications > G7 sensor alerts.

To change your sensor:

  1. On the System screen, in the Dexcom G7 section, tap More > Replace.

  2. Wait until the sensor status shows Sensor stopped before removing the sensor from your skin. This may take up to 5 minutes.

  3. Follow the on-screen instructions to pair your new sensor, and accept the Bluetooth pairing pop-up.

  4. Wait for the 30-minute warm-up period. Glucose values are then displayed again.

If you are in loop mode, you do not need to stop it to change your sensor. If loop mode has been stopped, do not forget to restart it once your new sensor is ready.

When should I calibrate the sensor?

Calibrating your G7 is optional. Calibration with your blood glucose meter may align your sensor readings with your blood glucose meter values.

How do I change my Kaleido pump every 3 days?

The Kaleido starter kit contains two pumps: use one while the other is charging. A fully charged pump lasts one cartridge cycle, up to 3 days. At each change, you replace the pump, the cartridge and the infusion set.

DBLG2 informs you via the alarm system when it is time to change your cartridge. To change your pump:

  1. On the System screen, in the pump section, tap Stop.

  2. Disconnect the pump from your infusion site.

  3. Remove the cartridge from the pump. This disconnects the pump from the DBLG2 app.

  4. Prepare the other, fully charged pump with a new infusion set and a new fully-filled cartridge. Refer to the user guide for instructions.

  5. On the System screen, in the pump section, tap Pair. Keep your phone within 50 cm of the pump and check that the color and the 12-digit serial number match.

  6. Follow the on-screen instructions. The app asks you to confirm whether the cartridge and the infusion set are new, and the size of the cannula, before priming and starting insulin delivery.

You do not need to stop loop mode to change your pump. If loop mode has been stopped, do not forget to restart it once your new pump is operating.

Put the removed pump on charge right away, so it is fully charged for the next change.

How do I temporarily remove my Kaleido pump?

You can remove your pump for a short time without changing your cartridge or pairing your pump again.

  1. On the System screen, in the pump section, tap Stop. This stops insulin delivery.

  2. Wash your hands, unclip the connector and close the protective cover.

  3. Lift the pump away from your body patch. Leave the patch on your skin.

  4. When you are ready, reconnect the insulin cartridge to your infusion set connector.

  5. On the System screen, in the pump section, tap Start to resume insulin delivery.

When can I use the pump control mode?

You can use the DBLG2 app's pump control mode to:

  • Deliver or stop a bolus.

  • Apply (and stop) a temporary basal rate (only when loop mode is OFF).

To access this mode:

  • Tap theAdd event icon on the Home or Events screen and then select Pump bolus, or

  • Go to the System screen and in the pump section tap More > Pump control.

DBLG2 Profile

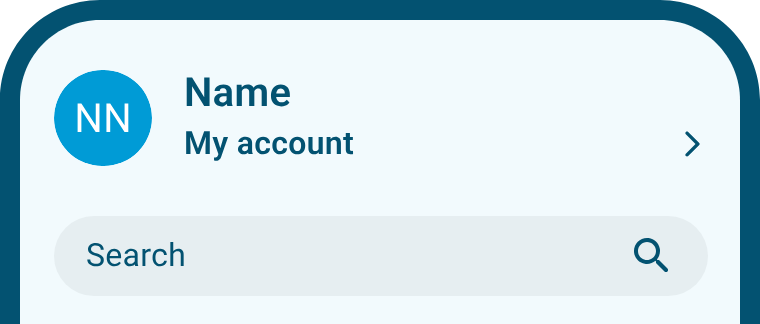
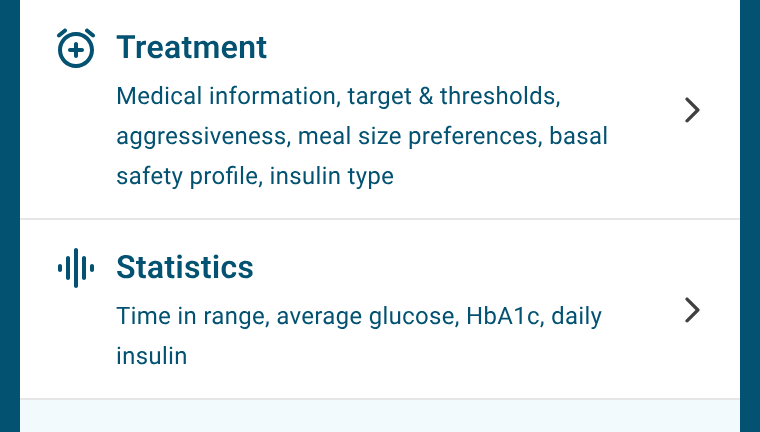
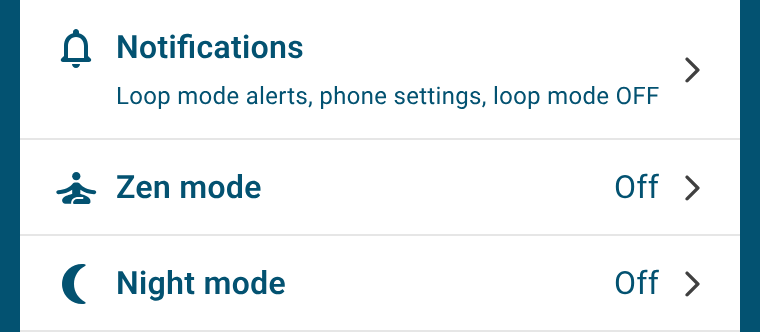
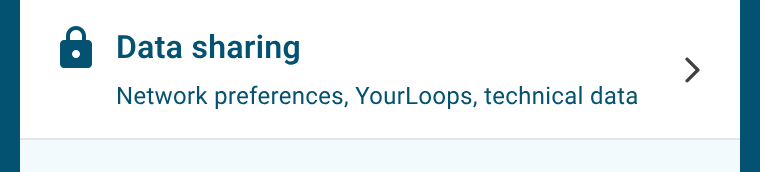
What's on the Profile screen?

The Profile screen enables you to customize your DBLG2 application and view treatment- and application-related information.

DBLG2 app illustration: Profile1

Update your personal information and change your YourLoops email and/or password.
Manage your account (log out to switch phones, delete your account to stop using DBLG2).

DBLG2 app illustration: Profile2

Update your medical information and customize treatment settings.

DBLG2 app illustration: Profile3

Configure notifications.
Configure and switch on Zen mode and Night mode.

DBLG2 app illustration: Profile4

Configure data sharing.

DBLG2 app illustration: Profile5

Get help on the various system components / access the user guide.

View privacy and security information relating to the use of the application.

View legal information about your system.

How do I change my email address on DBLG2?

To change your email address, go to Profile > My account.

Then:

  1. Tap Change email.

  2. Enter the email address currently linked to your account, and then enter your new email address and tap Confirm new email. A code will be sent to this new address.

  3. Enter the code received and tap Change email.

How do I change my password on DBLG2?

To change your password, go to Profile > My account.

Then tap Change password. You will receive an email with instructions on how to reset your password.

What do the “Log out” and “Delete account” options in the “My account” menu do?

If you log out of your account, your YourLoops session will be stopped and your data will be deleted from your phone. You will have to initialize the DBLG2 app again.

If you delete your account, you will stop using the system completely. All your data will be deleted from your phone and will no longer be accessible on YourLoops.

In both cases, you must stop loop mode and unpair the pump.

How do I set up notifications?

In Profile > Notifications you can set up alerts to sound even if your phone is in Do Not Disturb mode.

To set up notifications, go to Profile > Notifications > Phone notification settings. You'll see a shortcut to the notification settings of your DBLG2 app on your phone (permissions, sound and display of notifications, depending on the phone). You can configure your phone's notifications so that they display correctly.

What is Zen mode?

Zen mode is designed to reduce the risk of hypoglycemia in specific situations, such as a long car journey, an office meeting or any other situation where using your system could prove difficult. Activating Zen mode raises your target glycemia by 20 mg/dL | 1.1 mmol/L. You can adjust this increase in target glycemia and the period during which Zen mode is active.

You can configure and switch on Zen mode from the Profile screen.

When Zen mode is active, a temporary message on the Home screen shows the time remaining. Tap this message to access the Zen mode settings directly.

What is Night mode?

Night mode enables you to define a custom time range for night time. When Night mode is switched on, the following alarms/alerts become less intrusive.

Alarm/alert

Behavior in Night mode

21000 No glucose readings for over 30 minutes

Triggered when no readings have been received for over 120 minutes

22000 Loop mode failed to start

Never triggered at night time

20300 Rescue carbs are recommended

The hypoglycemia limit at which this alert is normally triggered is lowered by 10 mg/dL | 0.6 mmol/L.

Once switched on, Night mode will automatically activate every night until it is turned off.

What happens if data sharing is turned off on DBLG2?

If data sharing is turned off, the system stops transmitting your medical data to YourLoops.

The DBLG2 system allows you to stop transmitting your medical data to YourLoops for a specific period of time (3 hours, 12 hours, 1 day or 3 days). Set the data transfer to "Off" and choose a duration in the Data transfer settings sub-menu. After the specified time, the transfer of data resumes automatically using your preferred method (Wi-Fi or mobile network). The data collected during the "off" period is stored in your app only and will not be visible on YourLoops.

This mode is equivalent to the Confidential mode on DBLG1.

DBLG2 Notifications

What's in a notification?

Notifications provide key system information (for example, messages triggered by the alarm system, latest glucose reading, active modes, etc.).

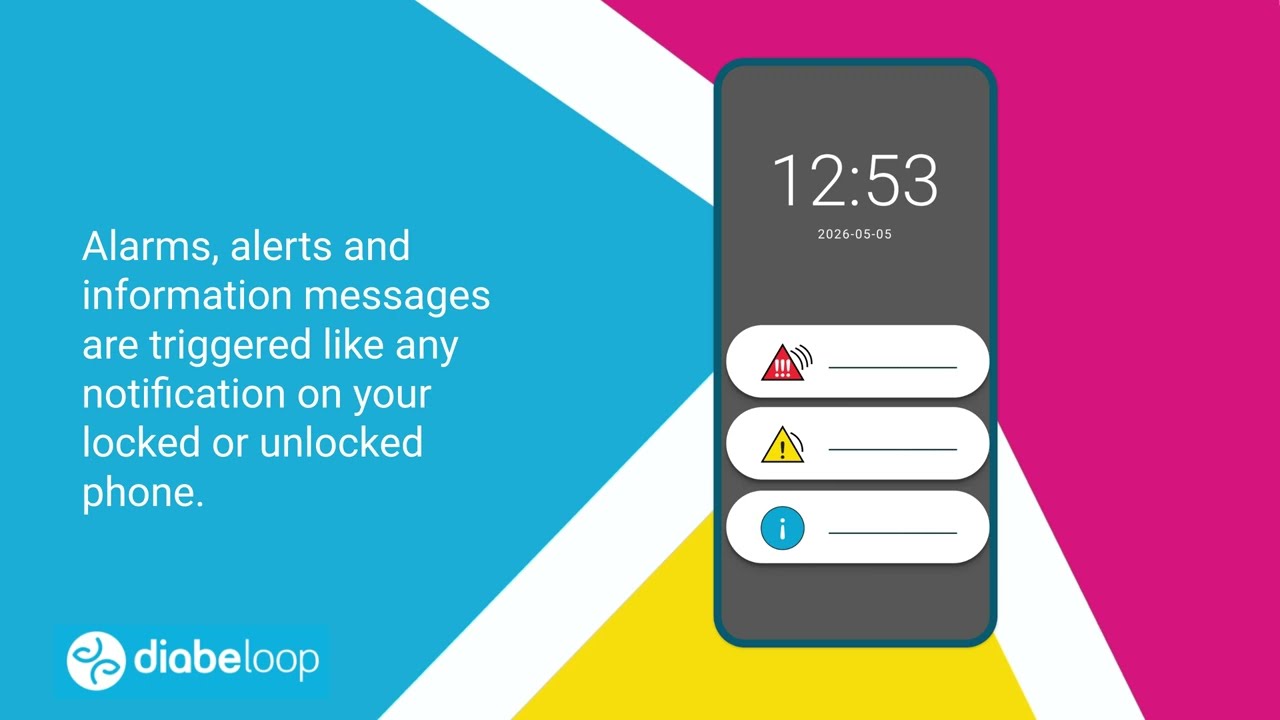
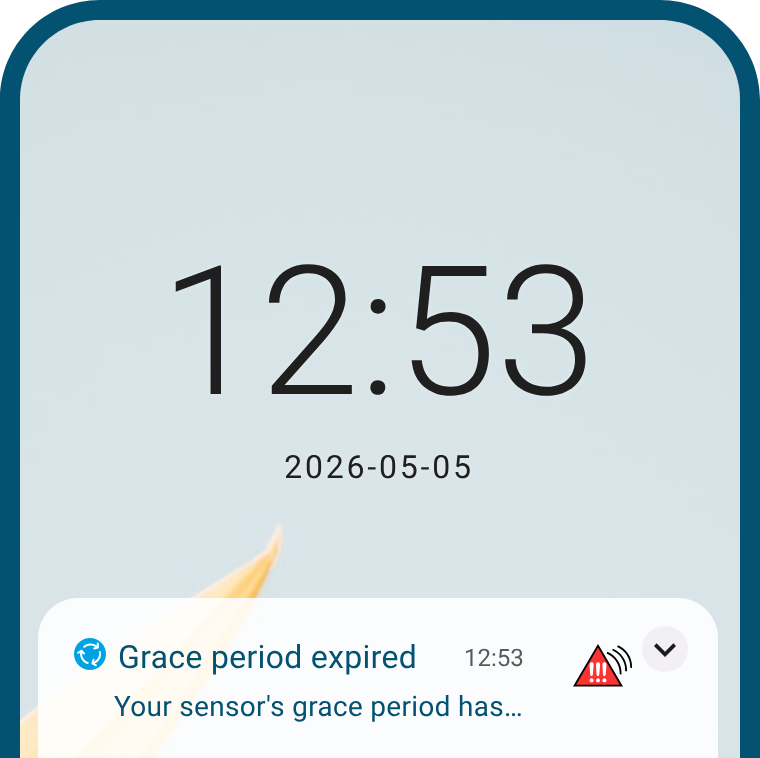
On your locked phone, they are displayed as shown.

DBLG2 app illustration: Notif1

DBLG2 alarm system notification. Tap the arrow on a notification to expand it and access its action buttons.

DBLG2 app illustration: Notif2

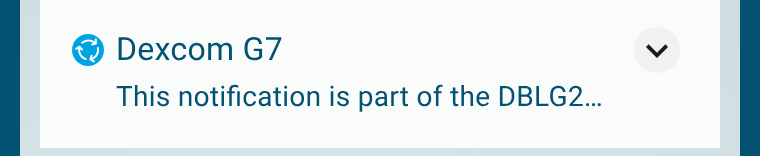
Permanent notification of the Dexcom G7 sensor.

DBLG2 app illustration: Notif3

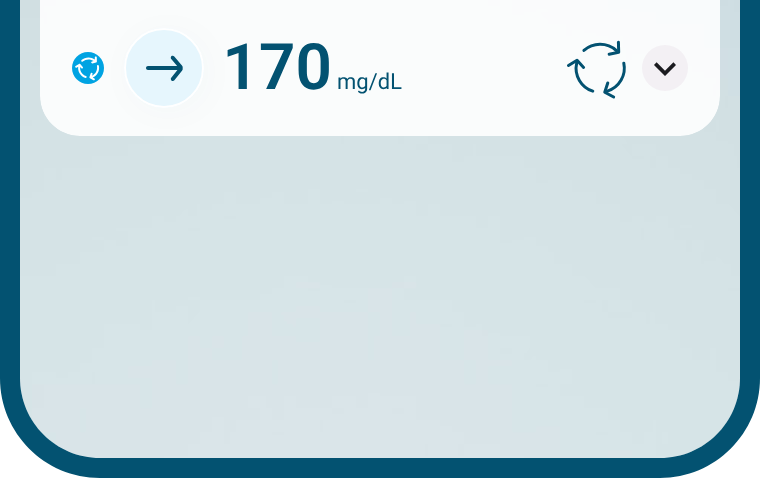
Permanent notification of DBLG2.

The latest glucose reading and trend arrow and loop mode status are always displayed as a permanent notification. 
Other information such as active modes (zen mode / night mode) or ongoing events such as physical activities or sensor warmup are also displayed. 

What do the alarm system icons mean?

The following table describes the alarm system icons that you can see in a notification.

Alarm

Alarm

High-priority alarm indicating a significant danger that requires immediate action.

Alert

Alert

Lower priority than an alarm.

Information

Information message

Informs you about the status and use of your system.

Where can I see notifications on my unlocked phone?

Permanent notifications are always displayed in the notification center. Swipe down from the top of your screen to open the notification drawer. 

Alarm system notifications remain in the notification center until you tap the notification. Once tapped, the notification disappears, but you can find it again in the list of events on the Events screen.

Can I adjust the sound of notifications?

Some notification sounds can be adjusted, while others cannot. This depends on the type of notification.

General behavior

  • Alarms always sound, regardless of your phone’s sound settings. The sound of alarms is not configurable.

  • The sound of alerts and information messages depends on your phone's sound settings.

    • Sound on: all DBLG2 alerts and information messages will sound. The volume of DBLG2 alerts and information messages corresponds to your phone’s ringtone volume. Therefore, to change the volume of alerts and information messages, adjust the ringtone volume in your phone's sound settings.

    • Vibrate or Silent mode: all DBLG2 alerts and information messages will be muted.

Possible customization

You can set some specific loop mode and G7 sensor alerts to always sound even when your phone is in Silent mode. To do this, go to Profile > Notifications > Loop mode alerts or G7 sensor alerts.
When set, the sound used to trigger these alerts is the same as for alarms and is not adjustable.

Which notifications sound when my phone is in silent mode?

It depends on the type of notification:

Notification typeBehavior when your phone is in silent or Do Not Disturb mode
AlarmAlways sounds, regardless of your phone's settings. Alarms cannot be configured.
AlertFollows your phone's sound and vibration settings, so it does not sound when your phone is muted. Some alerts can be configured to always sound (see below).
Information messageFollows your phone's sound and vibration settings, so it does not sound when your phone is muted.

You can configure the following alerts to always sound, even if your phone is in silent mode or Do Not Disturb mode:

In Profile > Notifications > Loop mode alerts (when loop mode is ON):

  • 20300 Rescue carbs are recommended

  • 20102 Rapid rise in glycemia.

In Profile > Notifications > G7 sensor alerts:

  • A0109 Brief sensor issue

  • A0118 Grace period expires soon.

To check that alarms are audible on your phone, go to Profile > Notifications > Alarm sound check. Alarms should remain audible even if your phone is muted, in Do Not Disturb mode, or connected to a Bluetooth® speaker or headphones.

What can I do if I don't see any notifications on my phone's locked screen?

If you can't see any notifications on your phone's locked screen, you can adjust the notification settings in your phone's settings. A shortcut to your phone's settings is provided in Profile > Notifications > Phone notification settings > Manage notifications.

DBLG2 Meals

How do meal boluses work?

When you declare a meal with loop mode turned ON, the algorithm calculates your insulin needs and, if necessary, sends you a meal bolus recommendation that you’ll need to confirm before it can be delivered. In the case of a two-part bolus, only the first part needs to be confirmed.

Will I receive a meal bolus recommendation if loop mode is OFF?

No, if loop mode is OFF, you won't receive a meal bolus recommendation when you declare a meal. However, if you turn loop mode back ON afterward, you may receive a meal bolus recommendation once loop mode is active.

You can also administer a "manual" bolus from the pump control mode if loop mode is OFF.

Can I declare a meal while the sensor is warming up?

Yes, you can declare a meal while the sensor is in its warmup phase, but you won't receive a meal bolus recommendation during this time. Loop mode can recommend a meal bolus once it has received enough glucose data from the sensor.

Can I declare a meal after I've eaten?

If you've forgotten to declare your meal before actually having your meal, you can declare it afterwards. 

Make sure you enter the correct quantity of carbs and the exact time of the meal.

If loop mode considers it appropriate, you may receive a meal bolus recommendation.

What happens if I don't declare my meals?

If you don't declare your meals, you won't receive any meal bolus recommendations, but loop mode will correct a rise in glucose by sending correction boluses.

DBLG2 Physical activities

How is physical activity managed?

When you declare some physical activity, loop mode raises your target glucose level in order to allow the activity to begin with a higher glucose level.

When should I declare physical activity?

We recommend that you declare your physical activity at least one hour before the session starts, and before declaring any upcoming meal.

DBLG2 Glucose levels

What should I do if my sensor readings don't match my symptoms?

If your sensor readings don't match your symptoms, you should use a blood glucose meter to make treatment decisions.

What should I do if communication with the sensor is lost?

If communication with the sensor is lost, here's what you can do.

  • Make sure your phone is close to the sensor.

  • If alarm 63000 – Bluetooth® is disabled is triggered, enable Bluetooth and wait a few minutes to see if sensor readings resume.

  • If no alert or alarm is triggered, wait up to 30 minutes: some alerts may take 15 to 30 minutes to trigger.

  • If an alert or alarm is triggered, follow the actions to be taken described in your user guide or in the Help menu (Profile > Help and contact).

  • If you previously used a Dexcom receiver, disconnect the sensor from it.

  • If you are unable to resolve the issue, contact your local distributor.

How is hyperglycemia managed by loop mode?

If your glucose levels are increasing and loop mode is ON, the DBLG2 system automatically delivers correction boluses.
No additional action is required from you, as the system efficiently manages this process.

What should I do in the event of unexplained hyperglycemia?

If your glucose remains high without any obvious reason, follow these steps:

  • Consider manual insulin injection.

  • Check your glucose with a blood glucose meter.

  • Check your ketones.

  • Treat the glycemic situation as needed, as a priority.

  • Check the status of your system: pump, infusion set and tubing, and loop mode. Visually inspect your tubing for obstructed or bent areas, and check your cartridge for bubbles.

  • Change your infusion set and your cartridge if necessary.

If the hyperglycemia persists, contact your healthcare professional.

How is hypoglycemia managed by loop mode?

If loop mode detects a risk of hypoglycemia, you will receive a rescue carb recommendation with the quantity of rescue carbs to take.

Can I configure the rescue carb recommendation alert to always sound?

Yes, you can configure the alert 20300 - Rescue carbs are recommended to always sound, even if your phone is in Silent mode or Do Not Disturb mode. To do so, go to Profile > Notifications > Loop mode alerts.

Note that other alerts, such as some G7 sensor alerts, can also be configured in the same way. Go to Profile > Notifications and then to G7 sensor alerts.

DBLG2 Application and phone management

How do I update the DBLG2 app?

When an app update is available, you are informed directly on your phone:

  • A message from the app store is displayed on your screen. The information is also available in the app.

After an app update, you should:

  1. Check that your sensor and pump have reconnected automatically and are working correctly.

  2. Start loop mode if it is switched off.

Can I update my phone's operating system (OS)?

Before updating your phone's OS, check that the new version is compatible with the DBLG2 app. You can find the list of compatible OS versions in the user manual, in Profile > Help and contact.

Do not update your phone to an unsupported OS version. Wait for Diabeloop to confirm that it is safe to update. An OS update can change your phone settings or shut down the app.

After an OS update, you should:

  1. Restart the DBLG2 app.

  2. Grant any new permissions requested.

  3. Check that your sensor and pump have reconnected automatically and are working correctly.

  4. Start loop mode if it is switched off.

How do I change my phone?

The DBLG2 app can be used on only one phone at a time. To switch to a new phone:

  1. Install the DBLG2 app on your new phone.

  2. Initialize the app with the same activation code and your YourLoops credentials. Use the settings found on YourLoops, or ask your healthcare professional for help.

  3. On your old phone, go to Profile > My account > Manage account and log out of your account. If your pump is delivering insulin, follow the on-screen instructions to stop and unpair it.

If you cannot unpair your Kaleido pump from your old phone (for example, if it is broken), you can unlock it from your new phone in Profile > Help and contact > Unlock your pump.

YourLoops About YourLoops

What is YourLoops?

YourLoops is a web platform for DBLG1 or DBLG2 data visualization.

The platform allows you to:

  • Visualize information gathered from DBLG1 or DBLG2 (an automated insulin delivery system developed by Diabeloop). 

  • Share data between DBLG1 or DBLG2 users, their caregivers, and the healthcare professionals who treat them.

YourLoops is a CE-marked, class IIa medical device. This medical device is not subject to reimbursement

CE 0123

How is data uploaded?

Data is automatically uploaded every 5 minutes:

  • Through a SIM card (mobile network) on DBLG1.

  • Using your personal smartphone's cellular data or Wi-Fi with the DBLG2 app.

What is a caregiver?

A caregiver is a person (e.g., close relation, family member, or school staff member) designated by a DBLG1/DBLG2 user to view their diabetes data on YourLoops.

Data access is managed directly by the user, who can invite a caregiver via email or revoke their data access at any time.

What are the system requirements for using YourLoops?

For optimal performance, we recommend accessing YourLoops on a computer using Google Chrome. Using alternative browsers or mobile devices may result in a degraded user experience.

YourLoops Account creation and login

How to create an account?

The account creation process depends on whether you are a patient (DBLG1/DBLG2 user), a caregiver, or a healthcare professional.

  • For DBLG1 and DBLG2 Users (Patients):

    • Your YourLoops account is automatically created during the initialization of your DBLG1 or DBLG2 system.

    • To log in: Go to the YourLoops website and log in using the same email address and password you set up during your device initialization. 

    • As part of the two-step verification process, you may be prompted to enter a security code sent to your email. You can check the box to keep your authentication valid for 30 days.

  • For Caregivers and Healthcare Professionals:
    • Go to the YourLoops website and click on Register. Enter your email address and create a password.

    • You will receive an activation email. Click on the link provided in the email to activate your account.

    • Go back to the YourLoops login page, enter your new credentials, and follow the on-screen steps to finalize your account (such as selecting the "Professional" or "Caregiver" profile type)

I have forgotten my password

The way to request a password reset depends if you are a DBLG1/DBLG2 user, a caregiver or an healthcare professional.

  • For DBLG1 users:

    • Navigate to the reset menu on your handset:

      • Versions 1.12.xx and lower: Go to Menu > Settings > YourLoops

      • Versions 1.14.xx and higher: Go to Menu > Settings > DBLG1 > Credentials > YourLoops

    • Tap Reset password and then Receive Key. A one-time key will be sent to your registered email address.

    • Once you receive the email, tap CREATE NEW PASSWORD on your DBLG1 screen.

    • Enter the alphanumeric key (in uppercase with no spaces) and your new password.

  • For DBLG2 Users

    • In the DBLG2 app, go to: Profile > My account > Change password.

    • Tap Change password at the bottom of the screen.

    • Check your email inbox and click the link provided in the YourLoops email.

    • Enter your new password twice and tap Reset password.

  • Caregiver/ Healthcare professional:

    To reset your password, follow these steps:

    • On the YourLoops login page, click Reset password

    • Enter your account email address and click Continue.

    • Open the email sent to your inbox, click the provided link, and follow the instructions to set a new password.

I don't receive my DBLG1 verification key by email when attempting to reset my password

If you do not receive your verification key by email when changing your password in DBLG1, try the following:

  • Check that you are looking in the inbox of the email address associated with your YourLoops account. Don't forget to check your Spam folder.

  • Make sure the SIM card is correctly inserted into your DBLG1 and that the device is connected to a cellular network. If necessary, move to an area with network coverage and try again.

  • Wait about 10 minutes. If you still haven't received the email, request a new verification key.

  • If you still do not receive the verification key, please contact your local distributor for assistance.

I blocked my account

Entering an incorrect password five times will lock your account.

To unlock your account, go to your email inbox and click on the unblocking link provided in the automated email.

The activation email has not been received
  • Make sure that you check the mailbox corresponding to the email entered.

  • Check your spam folder.

  • If you still have not received anything after 24 hours, contact the appropriate support team.

Can I switch from a caregiver account to a healthcare professional account ?

Yes, you can switch from a caregiver account to a healthcare professional account:

  • When you are logged in YourLoops, click on your name and then on User account.

  • Following the account information, click on Switch to Professional Account. A pop-up window will open showing the changes to your account.

  • You must agree again to the terms of use and privacy policy

I am a patient and also a healthcare professional or caregiver. Do I need two YourLoops accounts?

Yes. If you use DBLG1 or DBLG2 and are also a healthcare professional or caregiver, you must use two separate YourLoops accounts, each with its own email address:

  • Patient account: created directly on your DBLG1 or DBLG2 during initialization. It allows you to view and share your own data.

  • Healthcare professional or caregiver account: created on the YourLoops website, with an email address different from the one linked to your patient account. It allows you to view the data of the patients who share it with you.

YourLoops Data sharing for Patients (DBLG1 or DBLG2 users)

How to share data with a caregiver or a healthcare professional?

You can share your data directly with individual caregivers, private practice healthcare professionals, or an entire hospital/clinic care team on YourLoops.

Sharing with an individual Caregiver or Healthcare Professional:

  • Log in to your account on the YourLoops website.

  • Go to the Teams/Caregivers Teams and caregivers menu menu and selectTeams and caregivers menu My caregivers.

  • Click + ADD CAREGIVER.

  • Enter the email address associated with their YourLoops account and click INVITE.

What is a care team?

A care team is a group of healthcare professionals working in the same medical facility (e.g., a hospital diabetes department).

Sharing your data with a team ensures better care coordination and continuous follow-up.

You have the right to refuse data sharing, and you can revoke a care team's access to your data at any time on YourLoops.

How to share data with a care team?

You can share your data with an entire care team in two ways: by joining the care team yourself or by accepting an invitation sent by them.

  • Join a care team:

    • Tap on the menu Teams/CaregiversTeams and caregivers menu and tap on Teams and caregivers menu Join a care team. 

    • Enter the unique care team identification code provided by your healthcare team.

  • Accept an invitation from the care team:

    • Once invited, you will receive an email and an in-app notificationNotifications on YourLoops.

    • Log into YourLoops, click the Notifications Notifications icon, and click ACCEPT.

    • Enter the unique care team identification code provided by your healthcare team to complete the connection.

Can I revoke access to my data?

Revoke access to a Caregiver:

  • Click on the dropdown menu Teams and caregivers menuat the top right of the screen then on My Caregivers. You will then see a list of people who have access to your data or those pending confirmation after receiving an invitation.

  • To cancel an invitation or revoke access, click on Stop sharing Remove caregiver. A prompt dialog box will ask you to confirm your choice. Click on Remove Caregiver to confirm deletion.

If you make a mistake, you can send another invitation to this person to access your data.

Revoke access to a care team:

  • Click on the dropdown menu Teams and caregivers menu at the top right of the screen. You will then see a list of Care teams who have access to your data.

  • Select the care team whose access you want to revoke.

  • Click on Leave Team. A prompt dialog box will ask you to confirm your choice.

If you make a mistake, you can register again the identification code to this care team to share your data.

You can also temporarily interrupt access to your data for all your connection by using confidential mode in DBLG1 / Data transfer OFF in DBLG2.

What is an identification team code?

A care team identification code (or team code) is a unique security code (9 digits code) assigned to a specific medical care team (such as a hospital department or clinic) on YourLoops.

  • Why is it needed? It acts as a security check to ensure that your private health data is only shared with the exact care team you intended to join.

  • Where do I get it? You must obtain this code directly from your doctor, nurse, or healthcare provider. You will be asked to enter it whenever you join a care team or accept a care team's invitation on YourLoops

YourLoops Data sharing for Healthcare professionals

What is a care team?

A care team is composed of one or more health professionals working in the same organization or department. For example, this could be the diabetes department in your hospital, with a manager and several diabetologists and nurses.

Once created, this team will be defined by a unique code that can be communicated to each patient followed by the team.

What is the difference between a care team and a private practice? (for Healthcare professionals)

Private practice is a good option for patients who do not want to share their data with an entire care team.

When you log in for the first time, you are in the My private practice view, without any patients. You can create or join several care teams. To switch between your private practice and your care teams, use the My private practice / Care team menu.

How to create a care team? (for Healthcare professionals)

To create a care team:

  1. Click the drop-down menu in the top-right corner of your account, then select Create a care team.

  2. In the pop-up window, enter the required information about your care team.

  3. Accept the Terms of Use to confirm that you are a licensed healthcare professional authorized to practice in your country and eligible to create a care team.

  4. Click Create.

Once your care team has been created, you will automatically be assigned the Administrator role. As an administrator, you can invite other healthcare professionals and grant or revoke administrator permissions at any time.

Your new care team will then appear in the drop-down menu in the top-right corner of the screen.

How to join a care team (for Healthcare professionals)?

To join a care team, you must either:

Create your own care team, or

Be invited by a care team administrator.

If you are invited to join a care team, you will receive an email notification. This email is for information purposes only—you must also accept the invitation from your YourLoops account.

To accept the invitation:

  1. Log in to your YourLoops account or create a Healthcare Professional account if you do not yet have one.

  2. Open your notifications and select the pending care team invitation.

  3. Click Accept.

You will not be able to access the care team until you have accepted the invitation in YourLoops.

How to update care team's information? (for Healthcare professionals)

Only team administrators can edit care team details. To make updates, navigate to your team profile and click Edit. You can update the team name, address, country, phone number, and email address. Once saved, these changes will automatically update for all accounts associated with the care team.

How to manage care team members and permissions? (for Healthcare professionals)

If you are a team administrator, navigate to Care Team Settings to perform the following actions:

  • Invite a member: Click Add healthcare professional, enter their email address, and optionally assign them administrator rights.

  • Update permissions: Check or uncheck the administrator box next to any member's name to give or remove admin access.

  • Remove a member: Click Remove from team next to the person you wish to remove.

  • Leave a team: Click Leave team to remove yourself from the care team.

How to invite a patient to share his/her data with my care team? (for Healthcare professionals)

To invite a patient to join the care team, first, make sure you are in the correct care team (select it from the dropdown menu in the top-right corner if necessary). You can then add a patient in two ways:

  • Share your team code: Go to the Care Teams tab to find your care team code. You can give this code to patients so they can manually join the care team.

  • Send an invitation: From the Home page with patients list, click Add new patient, enter their email address in the pop-up window, and send. Once sent, share the care team code (displayed in the Care team settings tab) with the patient. The patient will receive an email and will need to enter the code.

I get "an error occurred, try again later" when adding a patient (for Healthcare professionals)

This error usually indicates that the patient has already been invited to your care team and the invitation is currently pending in their account.

To resolve this:

  • Ask the patient to log into YourLoops and accept the pending invitation or notification.

  • If they haven't received it, verify that you entered their email address correctly.

  • If the issue continues, please contact contact@diabeloop.fr.

YourLoops Data displayed

What data are displayed in YourLoops?

YourLoops displays the data from your DBLG1 or DBLG2 system and calculates statistics.

It is organized into different tabs:

  • Dashboard: An overview of your last 14 days of data.

  • Daily: Your day-by-day detailed views.

  • Trends: Your long-term data patterns.

  • Profile: Your personal information.

  • Devices: Your system configurations and device details.

How statistics are calculated?

Each statistic in YourLoops is calculated based on specific clinical requirements or time period.

To see the exact details for any metric, simply hover your cursor over the information icon Information icon next to that statistic on the platform.

How to export a report?

You can export patient data as a PDF, CSV file, or copy device settings directly to your Devices page:

  • Download PDF or CSV reports: Select a patient and click Download Report on the right side of the navigation bar. Choose a fixed period and select the output format (pdf or CSV) to download the file.

  • Copy device settings: In the Devices tab, select and click Copy to copy the displayed information directly to your web platform for easy pasting into records or notes.

Can I change my DBLG1/DBLG2 settings from YourLoops?

No. YourLoops only displays your system settings: you cannot modify them from the YourLoops website. Changes can only be made in your DBLG1 or DBLG2 interface. In YourLoops, you can view your current settings and their change history in the Devices tab.

Why aren't my data showing up in YourLoops?

There are several reasons why your data may not appear in YourLoops:

  • The device is unable to transmit data. This can happen if the device has no network connectivity, for example while traveling abroad.

  • A specific mode has been enabled on your DBLG1 (Confidential mode) or DBLG2 (Stop Data transfer).

  • The email address associated with your DBLG1 is not valid. If the email address used during the initialization DBLG1 is wrong, data synchronization may fail.

If you've checked these points and your data still isn't appearing, please contact your local distributor for assistance.

What is Confidential Mode / Data Transfer OFF?

Confidential Mode (DBLG1) and Data Transfer OFF (DBLG2) temporarily stop data from being uploaded to YourLoops.

You can choose to pause data transmission for 3 hours, 12 hours, 1 day, or 3 days. Once the selected period has ended, data uploads to YourLoops will automatically resume.

Please note that any data generated while Confidential Mode or Data Transfer OFF is enabled cannot be recovered or uploaded later.

These modes are available only on commercial versions of the DBLG1/DBLG2 medical device.

Why has my data stopped syncing while I'm traveling?
  • For DBLG1 users:

The SIM card in your DBLG1 provides coverage only in the following countries and territories:

Andorra, Austria, Belgium, Bulgaria, Cyprus, Croatia, Denmark, Estonia, mainland France, Finland, Germany, Gibraltar, Greece, Guadeloupe, French Guiana, Hungary, Guernsey & Jersey Islands, Reunion Island & Mayotte, Isle of Man, Ireland, Iceland, Italy, Latvia, Liechtenstein, Lithuania, Luxembourg, Malta, Martinique, Monaco, Norway, Netherlands, Poland, Portugal, the Czech Republic, Romania, the United Kingdom, San Marino, Saint Pierre and Miquelon, Slovakia, Spain, Sweden and Switzerland.

If you travel outside these covered areas, your device will stop uploading data to YourLoops. During this time, your data is safely stored on your DBL medical device but will not be visible in YourLoops.

Once you return to a covered country or territory, data synchronization will automatically resume on the first day of the following month. At that point, all historical data stored on your device during your trip will be uploaded to YourLoops.

Example: If you travel to the United States from January 7 to January 15, data uploads will stop while you are abroad. Synchronization will restart on February 1, and the historical data stored on your device from January 7 through January 31 will then be uploaded to YourLoops.

  • For DBLG2 users:

If you travel outside your mobile coverage area, your device will stop transmitting data to YourLoops via cellular network. You can continue uploading your data by connecting to a secure Wi-Fi hotspot.

In areas with poor or nonexistent network connection (such as at sea or in remote regions), data transmission may be temporarily affected. All data remains safely stored on your device and will automatically sync to YourLoops as soon as you connect to a reliable Wi-Fi network or covered cellular network.

What to do when my data is no longer being displayed?

If your data is no longer displayed in YourLoops, try the following:

  • Check that your DBLG1/DBLG2 is connected to a mobile network (or Wi-Fi for DBLG2).

  • Make sure you are in an area with cellular network coverage, especially when traveling abroad (or use Wi-Fi in DBLG2).

  • Verify that Confidential Mode (DBLG1) or Data Transfer OFF (DBLG2) is not enabled.

  • Ensure that the DBLG1 SIM card is correctly inserted into the SIM card slot.

  • If you have recently replaced your DBLG1, make sure you used the same password during initialization as the one associated with your YourLoops account. If necessary, you can reset your password.

There’s been an update to YourLoops and I can no longer access my data.

After certain system updates, you must complete a brief training acknowledgement before accessing your data. To restore access:

  • Tap Open training on the notification prompt (opens in a new window).

  • Read through the provided training materials.

  • Return to the YourLoops window and check the box to confirm you completed and understood the training.

  • Once confirmed, you will be able to access your account and data as usual.

YourLoops Account management for Patients (DBLG1 or DBLG2 users)

Updating personal information on YourLoops (for patients)

You can change your first and last name and your date of birth (not available in the clinical environment).

  • Click on your name at the top right of the screen then on User account in the dropdown menu, Change the information.

  • Click on save.

Changing my email address or password (for patients)

To change your email address or password, go to your DBLG1 or DBLG2:

  • For DBLG1 users:

    • Navigate to the reset menu on your handset:

      • Versions 1.12.xx and lower: Go to Menu > Settings > YourLoops

      • Versions 1.14.xx and higher: Go to Menu > Settings > DBLG1 > Credentials > YourLoops

    • Select CHANGE LOGIN (email address) or CHANGE PASSWORD and follow the instructions on the screen.

  • For DBLG2 users

    • In the DBLG2 app, go to: Profile > My account > Change email or Change password.

    • Check your email inbox and follow the instructions.

Can I change the language on YourLoops? (for patients)

You can modify the language on YourLoops.

  • Click on your name at the top right of the screen then on User account in the drop-down menu.

  • Change the information

  • Click on SAVE.

Deleting my YourLoops account (for patients)

Depending on your situation, deletion of your account may interfere with the terms of use of your system. We invite you to consult the Terms of Use of your DBL medical device as a preamble.

If you have any questions regarding the deletion of your account and/or your data, please send us a request by email to dpo@diabeloop.fr.

YourLoops Account management for Healthcare professionals and Caregivers

Updating personal information on YourLoops (for Healthcare professionals or Caregivers)

You can change your name.

  • Click on Your Name at the top right of the screen then on User account in the dropdown menu.

  • Change the information.

  • Click on SAVE.

Changing my YourLoops email address or password (for Healthcare professionals or Caregivers)

To change password or email:

  • Log in to your YourLoops account

  • Click in the top right corner of the screen on Your name and then on User account in the dropdown menu.

  • Click on Change password or Change e-mail

  • You will receive an email with a link

Can I change the language on YourLoops? (for Healthcare professionals or Caregivers)

You can modify the language on YourLoops.

  • Click on your name at the top right of the screen then on User account in the dropdown menu.

  • Change the information

  • Click on SAVE.

Can I change glucose units on YourLoops? (for Healthcare professionals or Caregivers)

To simplify the data visualization, you will be able to choose the unit in which to view the glucose values.

  • Click on Your name at the top right corner of the screen and then on User account in the dropdown menu.

  • Choose the unit you wish to view in mg/dL or mmol/L.

  • Click on Save.

Deleting my YourLoops account (for Healthcare professionals or Caregivers)

If you would like to stop using YourLoops and delete your account, please send your request by email to dpo@diabeloop.fr. We will work to process your request as soon as possible in accordance with the General Data Protection Regulation (GDPR).

YourLoops Help & Contact

Who can I contact for help?
Where to find YourLoops training documents?

You will always be able to access the training materials at the footer of the YourLoops website by clicking on Training:

  • From the login page, for the unique guide to creating an account, accessible to all profiles.

  • When you’re logged in, for the guide specific to your profile: healthcare professional, caregiver or patient.

YourLoops Data confidentiality

How is my data protected?

Diabeloop collects and processes personal data in accordance with the General Data Protection Regulation (GDPR).
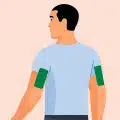
For details on how your data is handled, please refer to the data privacy policy of your product and/or the Diabeloop privacy policy (https://www.diabeloop.com/privacy-policy). 

These guides complement your training and the instructions for use supplied with your system. For questions about treatment, contact your healthcare team.

Open YourLoops ↗